
How to Use Toybox 3D Printer – Easy Steps to Follow
Imagine turning your wildest ideas into tangible toys and creations with just a few taps on your phone. That’s the magic of the Toybox 3D printer, a pint-sized powerhouse that’s revolutionizing playtime for kids and adults alike.
Don’t let its compact size fool you – this little marvel packs a serious punch when it comes to bringing imagination to life. Whether you’re a curious newcomer to the world of 3D printing or a seasoned maker looking for a user-friendly option, the Toybox has got you covered.
How to Use Toybox 3D Printer
In this guide, we’ll walk you through everything you need to know to get started on your 3D printing adventure. From unboxing and setup to printing your first masterpiece, we’ll cover all the bases and throw in some pro tips along the way.
So, grab your thinking cap and get ready to dive into the exciting world of 3D printing with the Toybox. Trust me, once you start, you’ll wonder how you ever lived without it!
Understanding the Toybox 3D Printer
Before we dive into the practical aspects of using the Toybox 3D printer, it’s essential to understand the basics of the device and its ecosystem.
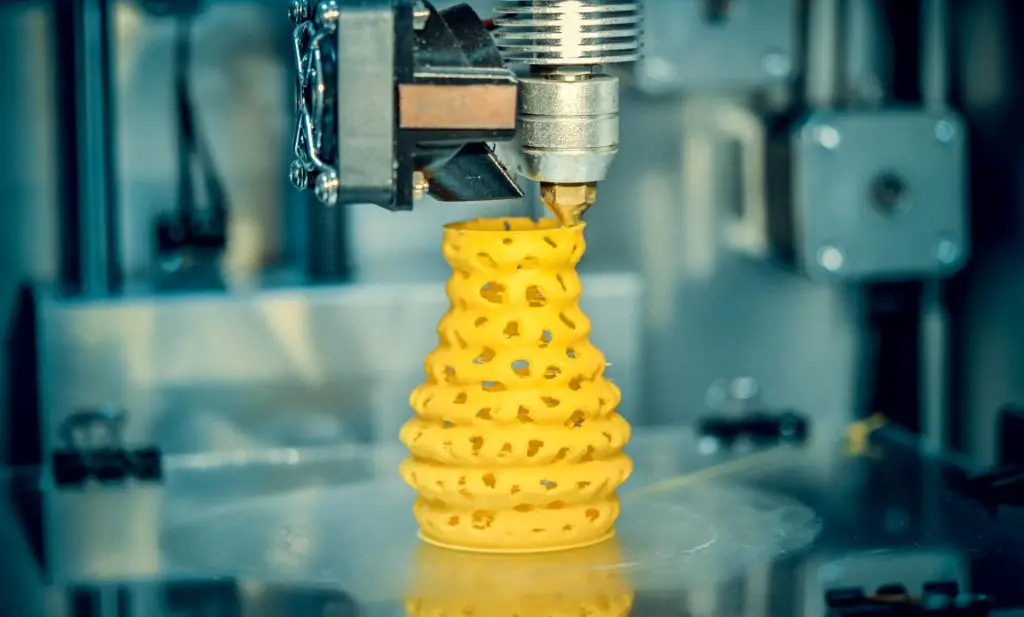
The Toybox 3D printer is a fused deposition modeling (FDM) printer, which means it creates objects by layering melted plastic filament. This technology allows for the creation of durable, three-dimensional objects from digital designs.
The Toybox system consists of three main components:
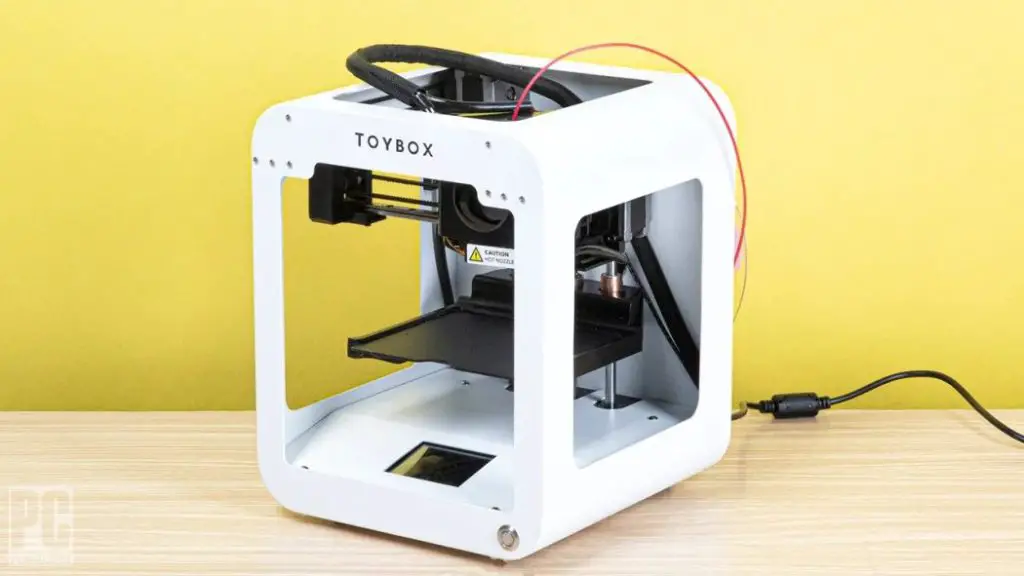
- The Toybox 3D printer: A compact, child-safe device that performs the actual printing.
- The Toybox app: Available for iOS and Android devices, this software allows users to select, customize, and send prints to the printer.
- Toybox filaments: Non-toxic, biodegradable PLA (polylactic acid) filaments available in various colors.
One of the key advantages of the Toybox system is its closed ecosystem. The printer is designed to work seamlessly with the app and proprietary filaments, ensuring a consistent and user-friendly experience. This integration simplifies the printing process, making it accessible even to young children under adult supervision.
Now that we have a basic understanding of the Toybox 3D printer, let’s move on to the step-by-step process of setting up and using the device.
Setting Up Your Toybox 3D Printer

Step 1: Unboxing and Initial Setup
Begin by carefully unpacking your Toybox 3D printer. Inside the box, you should find:
- The Toybox 3D printer
- Power adapter
- Build plate
- Sample filament spool
- Quick start guide
Ensure all components are present and undamaged. Place the printer on a stable, level surface with adequate ventilation.
Step 2: Connecting the Printer
Plug the power adapter into the printer and then into a wall outlet. Turn on the printer using the power switch located on the back of the device.
Step 3: Installing the Toybox App
Download the Toybox app from your device’s app store (iOS App Store or Google Play Store). Install the app and create an account if you haven’t already done so.
Step 4: Connecting to Wi-Fi
Open the Toybox app and follow the on-screen instructions to connect your printer to your home Wi-Fi network. This step is crucial for sending print jobs from the app to the printer.
Step 5: Loading Filament
Open the filament compartment on the side of the printer. Place the filament spool onto the holder, ensuring it can rotate freely. Feed the end of the filament into the extruder until you feel it catch. The printer will automatically load the filament when it’s time to print.
Step 6: Calibrating the Build Plate
The Toybox 3D printer features auto-leveling, but it’s still important to ensure the build plate is properly installed. Place the build plate on the printer’s base, making sure it’s seated correctly and level.
With these steps completed, your Toybox 3D printer is now set up and ready for its first print job.
Related Article: How to Clean Glue Off 3D Printer Bed
Printing Your First 3D Model
Now that your Toybox 3D printer is set up, it’s time to create your first 3D print. The Toybox app offers a straightforward process for selecting and printing models.
Step 1: Choosing a Model
Open the Toybox app and browse the catalog of available designs. For your first print, it’s recommended to choose a simple, pre-designed model to familiarize yourself with the process.
Step 2: Customizing Your Print
Once you’ve selected a model, you can customize it using the app’s built-in tools. You may be able to change colors, resize the model, or add text, depending on the specific design.
Step 3: Preparing to Print
After customizing your model, tap the “Print” button in the app. The app will process the model and send it to your printer. Ensure your printer is turned on and connected to Wi-Fi.
Step 4: Starting the Print
The printer will automatically begin heating up and loading filament. Once it reaches the correct temperature, printing will start. You can monitor the progress of your print through the app.
Step 5: Removing the Finished Print
When the print is complete, allow the build plate to cool for a few minutes. Gently flex the build plate to release the printed object. If necessary, use the included scraper tool to carefully remove the print from the build plate.
Congratulations! You’ve now completed your first 3D print with the Toybox printer. As you become more comfortable with the process, you can explore more complex models and even start designing your own creations.
Advanced Techniques and Tips
As you gain experience with your Toybox 3D printer, you may want to explore more advanced techniques to improve your prints and expand your capabilities.
Multi-Color Printing
The Toybox 3D printer supports multi-color printing, allowing you to create more vibrant and detailed objects.
Step 1: Select a multi-color model in the app or design your own using multiple colors.
Step 2: Prepare the printer by loading the first color of filament.
Step 3: Start the print job as normal.
Step 4: When prompted by the app, pause the print and change the filament to the next color.
Step 5: Resume printing and repeat the process for any additional colors.
Creating Custom Designs
While the Toybox app offers a wide selection of pre-designed models, you can also create your own designs for printing.
Method 1: Using the Toybox Creator Tool
Step 1: Open the Toybox app and select the Creator tool.
Step 2: Use the available shapes and tools to design your model.
Step 3: Customize colors and sizes as desired.
Step 4: Save your design and print it like any other model.
Method 2: Importing External 3D Models
Step 1: Create or obtain a 3D model file in STL format.
Step 2: Use the Toybox app to import the STL file.
Step 3: Adjust the model size and orientation as needed.
Step 4: Print your custom design.
Optimizing Print Quality
To achieve the best results with your Toybox 3D printer, consider the following tips:
- Keep the build plate clean and free of debris.
- Ensure proper bed adhesion by applying a thin layer of glue stick to the build plate before printing.
- Experiment with different print speeds for various models to find the optimal balance between quality and print time.
- Regularly check and clean the printer’s nozzle to prevent clogs and ensure smooth filament flow.
Conclusion
The Toybox 3D printer offers an accessible entry point into the world of 3D printing, combining user-friendly design with powerful capabilities. By following the steps and techniques outlined in this guide, you’ll be well-equipped to explore the full potential of your Toybox 3D printer.
Remember that 3D printing is as much an art as it is a science. Don’t be afraid to experiment, make mistakes, and learn from the process. Each print job is an opportunity to refine your skills and push the boundaries of your creativity.
As you continue your 3D printing journey with the Toybox printer, stay curious and keep exploring new possibilities. Whether you’re creating custom toys, educational models, or unique inventions, the Toybox 3D printer provides a platform for turning your ideas into reality.
With proper care, maintenance, and a spirit of innovation, your Toybox 3D printer will serve as a valuable tool for learning, creating, and inspiring for years to come. So, fire up your printer, load some filament, and let your imagination soar into the three-dimensional world of possibilities that await you.
Frequently Asked Questions (FAQs)

1. How to connect Toybox 3D printer?
To connect your Toybox 3D printer, start by plugging it into a power source and turning it on. Next, connect the printer to your Wi-Fi network using the Toybox app on your smartphone or tablet.
Once connected, you can upload designs directly from the app or the Toybox website. Ensure your device and printer are on the same network for seamless communication. If you encounter any issues, try restarting both the printer and your device.
For first-time setup, follow the step-by-step guide provided in the user manual or on the Toybox website. Remember to keep your printer’s firmware updated for optimal performance and new features.
2. Can you print anything on a Toybox 3D printer?
The Toybox 3D printer offers a wide range of printing possibilities, but it does have some limitations. You can create many toys, figurines, and small objects using the printer’s catalog of designs or by uploading your own.
However, the Toybox has a limited build volume, so larger items are not feasible. It’s designed for child-safe, non-toxic PLA filament, restricting material options. While it excels at producing simple toys and decorative items, it may not be suitable for complex, functional parts or highly detailed models.
Always consider the printer’s capabilities and safety features when choosing what to print, especially since it’s marketed for children’s use.
3. Can you design your own toys with Toybox 3D printer?
Yes, you can design your own toys with a Toybox 3D printer. The system offers a user-friendly app that includes simple design tools, allowing children and adults to create basic custom shapes and objects.
For more complex designs, you can use third-party 3D modeling software and import your creations into the Toybox platform. The printer also supports STL files, giving you the flexibility to design toys using various professional software options.
While the design capabilities within the Toybox app are somewhat limited, the ability to import custom designs opens up a world of creative possibilities, enabling you to bring unique toy ideas to life.
How to Clean Glue Off 3D Printer Bed – Easy Ways to Follow
How to Scan an Object for 3D Printing – Easy Ways to Follow
How to Format SD Card for 3D Printer – Step by Step Guide
About Author
Mark Kelly
This is Mark, a printer expert from North Carolina, US. It has been 8 years since I started using and reviewing printers of all types. With that said, I decided to share my knowledge with you lovely people so you can make the perfect choice when it comes to choosing a printer.