
How to Use Blender for 3D Printing – Easy Ways to Follow
In the realm of 3D printing, having the right tools is essential to bring your creative ideas to life. Blender, a powerful open-source 3D modeling software, has emerged as a game-changer for designers, artists, and enthusiasts alike.
With its robust features and versatility, Blender allows you to create stunning 3D models that can be seamlessly exported and printed using a 3D printer.
In this comprehensive guide, we will explore the intricacies of using Blender for 3D printing, covering essential steps, multiple methods, and valuable tips to ensure a seamless workflow.
How to Use Blender for 3D Printing
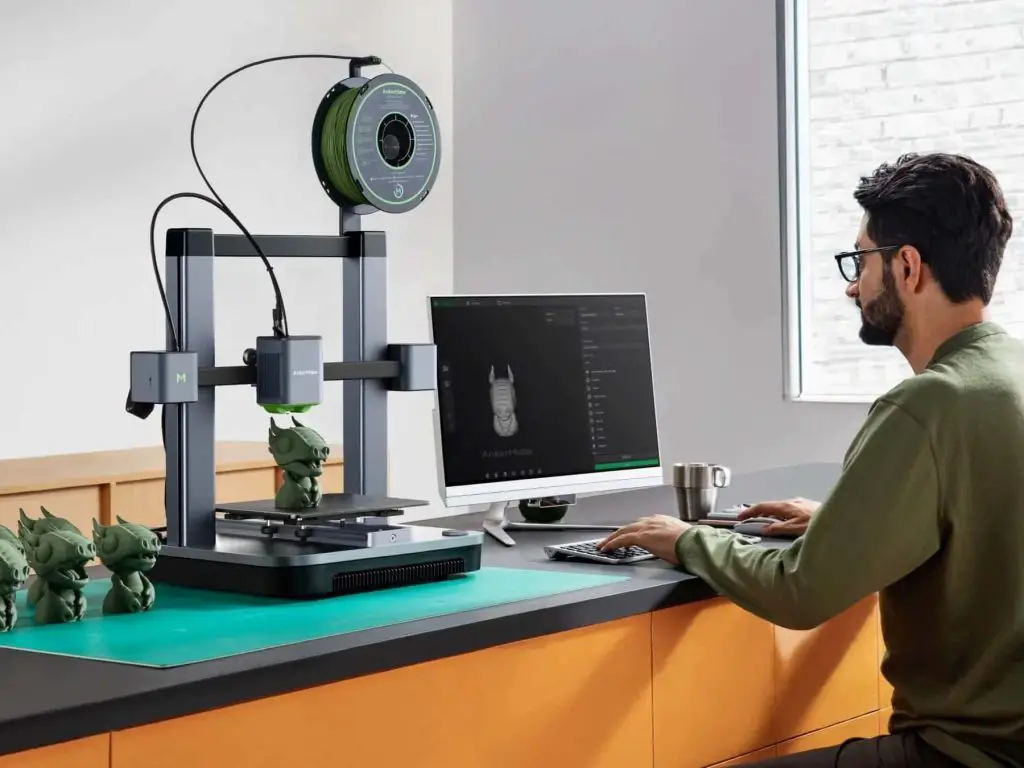
3D printing has revolutionized the way we approach design and manufacturing. It empowers individuals to transform their digital creations into tangible, physical objects. However, before you can print your model, you need to design and prepare it using specialized software.
Enter Blender, a powerful and user-friendly 3D modeling suite that offers a wide range of tools and features tailored for 3D printing.
Blender’s robust modeling capabilities, coupled with its intuitive interface and vast array of add-ons, make it an ideal choice for designing intricate 3D models.
From simple geometrical shapes to highly detailed and organic forms, Blender’s toolset enables you to unleash your creativity and bring your wildest ideas to life.
Setting Up Blender for 3D Printing
Before diving into the modeling process, it’s crucial to configure Blender for optimal 3D printing workflows. Here are the steps to get you started:
Install Blender: Head over to the official Blender website and download the latest version compatible with your operating system.
Configure Units and Scale: Once Blender is installed, open the application and navigate to the “Scene” tab. Here, you can set the appropriate units (e.g., millimeters or inches) and scale for your 3D printing project.
Install Add-ons: Blender offers a vast collection of add-ons that enhance its functionality. For 3D printing, installing the “3D Print Toolbox” and “Mesh Tools” add-ons can be incredibly helpful. These add-ons provide additional tools and features specifically designed for 3D printing workflows.
With Blender set up and configured, you’re ready to embark on your 3D modeling journey.
Method 1: Modeling from Scratch
One of the most common methods for creating 3D models in Blender is modeling from scratch. This approach allows you to build your designs from the ground up, giving you complete control over every aspect of the model.
Step 1: Start with a Primitive Object
Blender provides a range of primitive objects, such as cubes, spheres, and cylinders, which can serve as the foundation for your model.
Step 2: Sculpt and Shape
Utilize Blender’s robust modeling tools, including extrude, inset, loop cut, and subdivision surface modifiers, to sculpt and shape your model to your desired form.
Step 3: Add Details
Enhance your model by adding intricate details using Blender’s various sculpting and texture painting tools. This step is crucial for creating realistic and visually appealing models.
Step 4: Apply Materials and Textures
Blender’s material system allows you to apply different materials and textures to your model, giving it a realistic and polished look.
Step 5: Prepare for 3D Printing
Once your model is complete, use Blender’s built-in tools to check for any non-manifold geometry, fix intersecting faces, and optimize the model for 3D printing.
Step 6: Export the Model
Finally, export your model in a format compatible with your 3D printer, such as STL or OBJ.
Related Guide: How to Scan an Object for 3D Printing
Method 2: Modeling from Existing Meshes

While modeling from scratch is a powerful approach, sometimes you may want to start with an existing mesh or 3D model. Blender offers various tools and techniques to modify and customize existing meshes, allowing you to create unique and personalized designs.
Step 1: Import the Existing Mesh
Begin by importing the existing mesh or 3D model into Blender. Blender supports a wide range of file formats, including OBJ, FBX, and STL.
Step 2: Analyze and Optimize
Inspect the imported mesh for any issues, such as non-manifold geometry or intersecting faces, and use Blender’s tools to fix them.
Step 3: Modify and Sculpt
Utilize Blender’s powerful sculpting tools to modify the existing mesh. You can add or remove details, smooth surfaces, or create entirely new shapes.
Step 4: Boolean Operations
Blender’s Boolean operations (union, difference, and intersection) allow you to combine or subtract meshes, enabling you to create complex and unique designs.
Step 5: Retopology
If the existing mesh has an unsuitable topology for 3D printing, you can perform retopology to create a new, optimized mesh with better edge flow and polygon distribution.
Step 6: Apply Materials and Textures
Similar to modeling from scratch, you can apply materials and textures to your modified mesh to achieve the desired look and finish.
Step 7: Prepare for 3D Printing
Once you’re satisfied with your design, use Blender’s tools to check for any remaining issues and optimize the model for 3D printing.
Step 8: Export the Model
Finally, export your modified mesh in a format compatible with your 3D printer.
Tips and Best Practices

To ensure a smooth and efficient 3D printing workflow with Blender, consider the following tips and best practices.
Maintain Good Topology: Proper mesh topology is crucial for successful 3D printing. Ensure that your model has a clean, well-structured mesh with no non-manifold geometry or intersecting faces.
Use Modifiers Wisely: Blender’s modifiers can be powerful tools for creating complex shapes and effects. However, it’s essential to apply modifiers judiciously and avoid excessive stacking, which can lead to performance issues and potential errors.
Optimize for Printing: Before exporting your model, use Blender’s tools to optimize it for 3D printing. This may include reducing polygon counts, removing unnecessary details, and ensuring that the model is watertight and manifold.
Consider Print Orientation: The orientation of your model on the print bed can significantly impact the print quality and stability. Use Blender’s viewport to preview your model from different angles and choose the most suitable orientation.
Utilize Support Structures: For models with overhangs or complex geometries, you may need to generate support structures to ensure successful printing. Blender’s add-ons and built-in tools can help you generate and manage these support structures.
Test and Iterate: 3D printing is an iterative process. Don’t be discouraged if your first print doesn’t turn out as expected. Use Blender to analyze and make adjustments to your model, and try printing again until you achieve the desired results.
Related Guide: How to Use Fusion 360 for 3D Printing
Conclusion
Blender is a powerful and versatile tool for creating 3D models suitable for 3D printing. Whether you’re modeling from scratch or modifying existing meshes, Blender’s robust toolset and features provide endless possibilities for bringing your creative visions to life.
By following the steps outlined in this guide, incorporating multiple methods, and adhering to best practices, you’ll be well-equipped to navigate the world of 3D printing with Blender.
Embrace the learning curve, experiment with different techniques, and let your creativity soar as you embark on this exciting journey of turning digital designs into tangible, physical objects.
Frequently Asked Questions (FAQs)

1. Can I use Blender to make 3D prints?
Yes, you can use Blender to create 3D models that can be 3D printed. Blender is a powerful open-source 3D modeling software that allows you to design and sculpt intricate 3D objects.
Once you have created your desired 3D model in Blender, you can export it as an STL file, which is the standard file format used for 3D printing. This STL file can then be loaded into a 3D printing software, which will prepare the model for printing and send the instructions to your 3D printer.
Blender’s robust toolset and versatility make it a popular choice for creating 3D printable designs, especially for hobbyists and enthusiasts.
2. Is Blender good enough for 3D printing?
Blender is an excellent choice for creating 3D models suitable for 3D printing. With its comprehensive set of modeling tools, sculpting capabilities, and advanced features, Blender provides a powerful and versatile platform for designing intricate 3D objects.
Its user-friendly interface and extensive documentation make it accessible to both beginners and professionals alike. Additionally, Blender supports various file formats commonly used in 3D printing, such as STL and OBJ, allowing seamless integration with 3D printing software.
While professional-grade CAD software may offer more specialized tools for certain industries, Blender’s open-source nature, active community, and continuous development make it a highly capable and cost-effective solution for 3D printing enthusiasts and professionals.
3. How to export Blender model for 3D printing?
To export a Blender model for 3D printing, you need to follow these steps: First, ensure your model is properly prepared, with no non-manifold geometry or overlapping faces. Then, go to File > Export > Wavefront (.obj) or File > Export > STL (.stl).
The OBJ format preserves materials and textures, while STL is the industry standard for 3D printing. In the export settings, adjust the options like scale, forward/up axis, and apply modifiers as needed.
You can also check the “Export Only Selected Objects” option if you want to export specific parts. Once exported, the file can be sliced and prepared for 3D printing using specialized software like Cura or Slic3r.
How to Use Toybox 3D Printer – Easy Steps to Follow
How to Format SD Card for 3D Printer – Step by Step Guide
How to Clean Glue Off 3D Printer Bed – Easy Ways to Follow
About Author
Mark Kelly
This is Mark, a printer expert from North Carolina, US. It has been 8 years since I started using and reviewing printers of all types. With that said, I decided to share my knowledge with you lovely people so you can make the perfect choice when it comes to choosing a printer.