
How to Replace Ink Cartridge in HP Laserjet Pro MFP M428fdw – Easy Steps
The HP LaserJet Pro MFP M428fdw is a versatile multifunction printer that offers printing, scanning, copying, and faxing capabilities. It’s a popular choice for small offices and home-based businesses due to its compact design, impressive print quality, and user-friendly interface.
However, like any printer, the ink cartridges will eventually need to be replaced. Failing to replace the cartridges in a timely manner can lead to poor print quality, streaks, or even complete printing failure.
How to Replace Ink Cartridge in HP Laserjet Pro MFP M428fdw
In this comprehensive guide, we will walk you through the process of replacing the ink cartridge in your HP LaserJet Pro MFP M428fdw, ensuring you never run out of ink mid-project again.
Method 1: Standard Cartridge Replacement

Preparing for Cartridge Replacement
Before you begin the cartridge replacement process, gather the following items:
- New HP Laserjet Pro MFP M428fdw ink cartridge (part number: W2030A)
- Lint-free cloth or paper towels
- A clean, flat surface to place the cartridge on
Step 1: Power on the Printer
Locate the power button on the control panel of your HP Laserjet Pro MFP M428fdw and press it to turn the printer on. Wait for the printer to complete its startup sequence and become ready for operation.
Step 2: Open the Cartridge Access Door
On the front of the printer, locate the cartridge access door. It is typically located near the bottom of the printer and has a handle or indentation to allow you to grip and pull it open. Gently pull the door towards you to fully open the cartridge compartment.
Step 3: Remove the Old Cartridge
Inside the cartridge compartment, you will see the ink cartridge installed. Locate the handle or grip on the cartridge and grasp it firmly. Pull the cartridge straight out of the compartment in a smooth, controlled motion. Be careful not to shake or tilt the cartridge excessively, as this can cause toner to spill.
Step 4: Prepare the New Cartridge
Remove the new ink cartridge from its packaging. Be cautious when handling the cartridge, as it contains toner that can cause stains if spilled. Locate and remove any protective tape, covers, or seals from the new cartridge.
Step 5: Distribute the Toner
Before installing the new cartridge, you’ll need to distribute the toner evenly inside. Gently rock the cartridge back and forth several times, making sure to keep it level and not shake it vigorously. This will help ensure consistent print quality.
Step 6: Insert the New Cartridge
Locate the slot or compartment in the printer where the cartridge needs to be installed. Align the new cartridge with the slot and gently push it in until it clicks into place. Avoid forcing the cartridge, as this can damage the printer or the cartridge itself.
Step 7: Close the Cartridge Access Door
Once the new cartridge is securely installed, gently close the cartridge access door. Apply firm pressure to ensure it is fully closed and latched.
Step 8: Calibrate the Printer
After replacing the cartridge, your printer may prompt you on the control panel display to perform a calibration or cleaning routine. Follow the on-screen instructions carefully to complete the process. This step ensures that the new cartridge is properly aligned and functioning correctly.
Additional Tips
- Avoid touching the imaging drum or other sensitive components inside the printer compartment to prevent damage or image quality issues.
- Handle the ink cartridge carefully and avoid exposing it to excessive light or heat, as this can affect its performance.
- Consider recycling or properly disposing of the used ink cartridge according to your local regulations.
Related Article: How to Install LH2612A Laser Toner Cartridge
Method 2: Printer Cartridge Replacement with Manual Cleaning
If you encounter any print quality issues or streaks after replacing the cartridge, you may need to perform a manual cleaning process. Follow these steps.
Step 1: Remove the Cartridge
Repeat steps 2-3 from the “Standard Cartridge Replacement” method to remove the ink cartridge from the printer compartment.
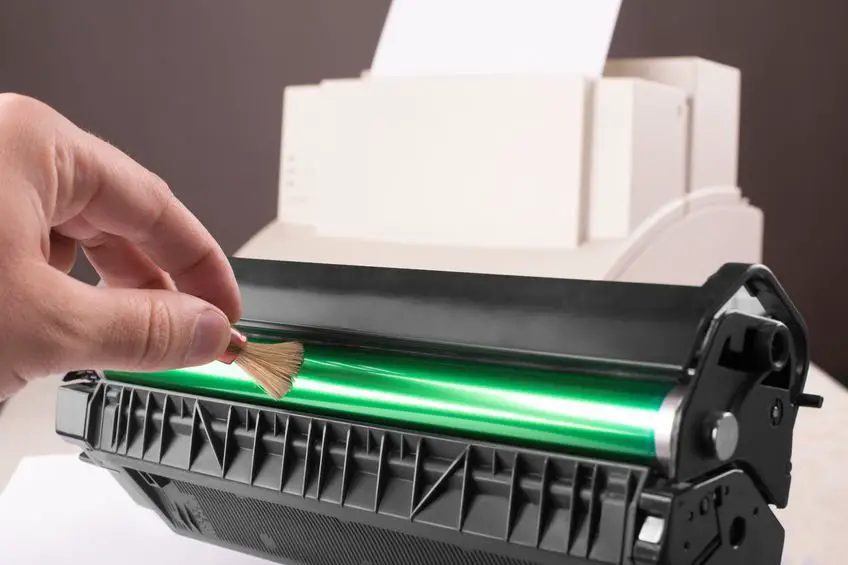
Step 2: Clean the Cartridge
Using a clean, dry, lint-free cloth or paper towel, gently wipe the imaging drum and other exposed components of the cartridge. Be extremely careful not to touch the drum with your fingers, as oils from your skin can damage the drum and affect print quality.
Step 3: Clean the Printer Compartment
With the cartridge removed, use a clean, dry cloth or paper towel to carefully wipe down the interior of the printer compartment. Remove any visible toner residue, dust, or debris that may have accumulated.
Step 4: Reinstall the Cartridge
After cleaning the cartridge and printer compartment, reinsert the cartridge by following steps 6-8 from the “Standard Cartridge Replacement” method.
Step 5: Calibrate and Clean the Printer
Follow any prompts or on-screen instructions to perform a calibration or cleaning routine after reinstalling the cartridge. This will help ensure optimal print quality and address any issues that may have arisen due to toner buildup or debris.
By following these steps, you can ensure that your HP Laserjet Pro MFP M428fdw is functioning optimally and producing high-quality prints.
Related Article: How to Change Print Speed on Ender 3
Conclusion
Replacing the ink cartridge in your HP Laserjet Pro MFP M428fdw is a straightforward process that can be completed in a matter of minutes. By following the step-by-step instructions outlined in this guide, you can prolong the life of your printer and maintain its printing capabilities.
Remember to handle the cartridges with care, properly dispose of used cartridges, and consider performing manual cleaning if you encounter any print quality issues.
With regular maintenance and proper cartridge replacement, your HP Laserjet Pro MFP M428fdw will continue to deliver reliable and efficient performance for years to come.
Frequently Asked Questions (FAQs)

1. What is the compatible toner for HP LaserJet Pro MFP M428fdw?
The compatible toner cartridge for the HP LaserJet Pro MFP M428fdw is the HP 58A Black Original LaserJet Toner Cartridge (CF258A). This toner cartridge is designed specifically for this multi-function printer model, ensuring optimal print quality, reliability, and longevity.
Using genuine HP toner cartridges ensures that your printer operates at peak performance while minimizing the risk of damage or wear to the printer components.
2. How to change toner in LaserJet pro mfp M428fdw?
To change the toner cartridge in the HP LaserJet Pro MFP M428fdw, follow these steps: Open the front cover by pressing the button near the cartridge area.
Gently pull out the old toner cartridge by holding the handle. Shake the new toner cartridge back and forth a few times to distribute the toner evenly. Remove the plastic cover and pull out the sealing tape from the new cartridge.
Insert the new cartridge into the printer by aligning it with the guides and pushing it in firmly until it clicks into place. Close the front cover. The printer will now initialize the new toner cartridge automatically.
3. How do I reset my HP LaserJet Pro MFP m428fdw?
To reset your HP LaserJet Pro MFP M428fdw printer, follow these steps: First, turn off the printer and unplug it from the power source.
Next, locate the reset button, which is typically a small recessed hole near the control panel. Using a paperclip or a pen tip, press and hold the reset button for at least 10-15 seconds.
Once the printer has reset, plug it back in and turn it on. The printer should now be in its factory default settings. This reset process clears any stored data, settings, or errors and restores the printer to its original configuration.

How to Refill HP 67 Ink Cartridge – Easy Steps to Follow

How to Refill Epson Ink Cartridge 200 – Easy Steps to Follow
How to Change Toner Cartridge in Brother Printer MFC-L2750DW
About Author
Mark Kelly
This is Mark, a printer expert from North Carolina, US. It has been 8 years since I started using and reviewing printers of all types. With that said, I decided to share my knowledge with you lovely people so you can make the perfect choice when it comes to choosing a printer.