
How to Refill Epson Ink Cartridge 200 – Easy Steps to Follow
Printer ink cartridges can be a significant recurring expense, especially for those who rely heavily on their printers for personal or professional use. Fortunately, many modern ink cartridges, including the Epson Ink Cartridge 200, are designed to be refillable, offering a cost-effective solution for those looking to reduce their printing costs.
In this article, we will explore various methods for refilling the Epson Ink Cartridge 200, ensuring that you can continue printing without breaking the bank.
The Epson Ink Cartridge 200 is a popular choice among users due to its compatibility with a wide range of Epson printers, including the WorkForce, Expression, and Artisan series.
This cartridge is available in four different colors: black, cyan, magenta, and yellow, allowing for vibrant and accurate color reproduction. Refilling ink cartridges may seem daunting at first, but with the right tools and techniques, it can be a straightforward process.
How to Refill Epson Ink Cartridge 200
In the following sections, we’ll guide you through different refilling methods, from using refill kits to manual syringe refilling, ensuring that you have multiple options to choose from based on your preference and skill level.
Method 1: Using a Refill Kit
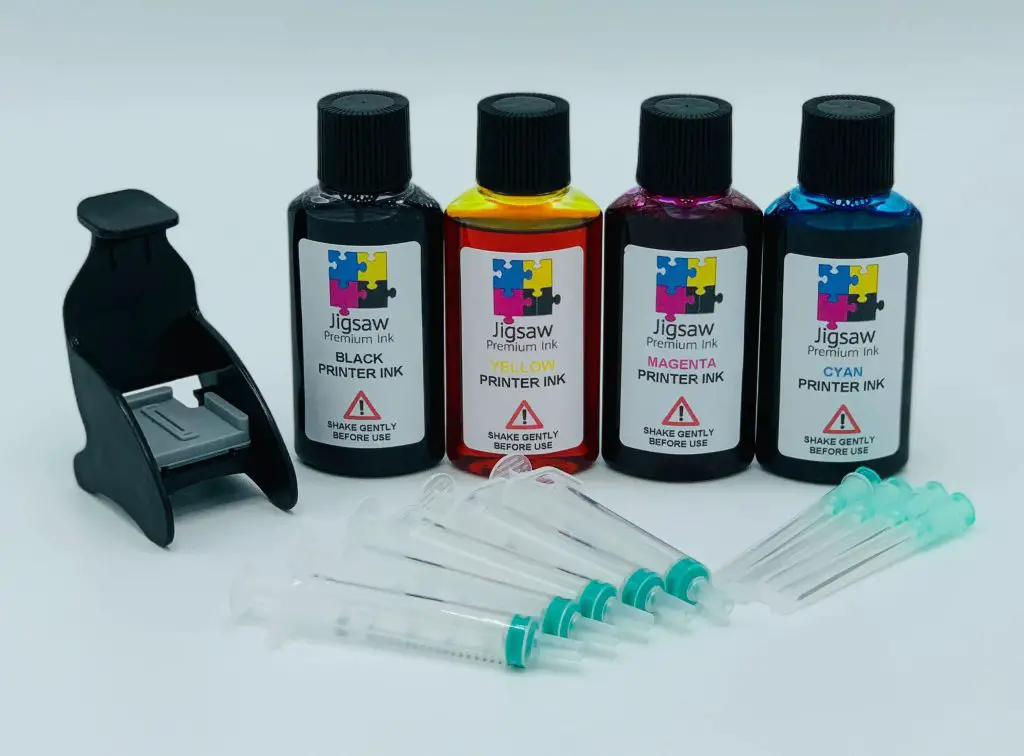
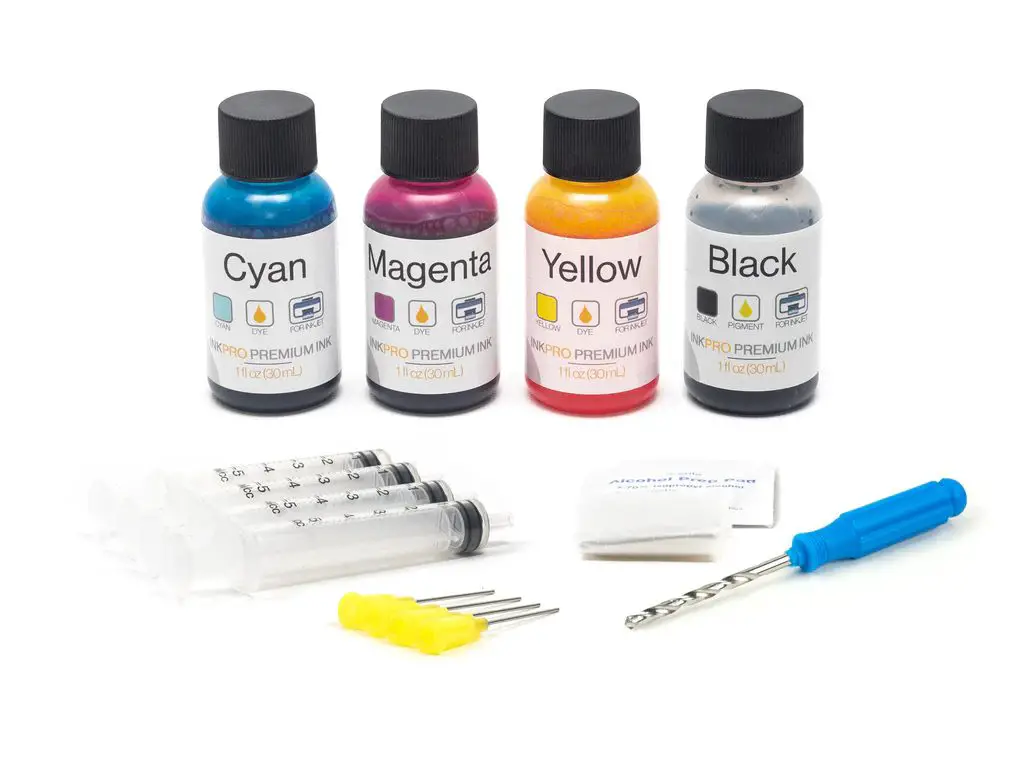
One of the most convenient methods for refilling the Epson Ink Cartridge 200 is to use a dedicated refill kit. These kits typically include everything you need to refill your cartridges, such as ink bottles, syringes, and instructions.
Step 1: Prepare the Cartridge
Start by removing the Epson Ink Cartridge 200 from your printer. Gently grasp the cartridge and pull it out of its slot, being careful not to touch the printhead or electrical contacts. Once removed, place the cartridge on a clean, lint-free surface. Inspect the cartridge for any cracks, leaks, or damage.
If the cartridge appears to be in good condition, use a lint-free cloth or paper towel to gently wipe away any excess ink or debris from the cartridge’s surface.
Step 2: Locate the Refill Ports
Carefully examine the cartridge to locate the refill ports. These are typically small holes or indentations on the top or side of the cartridge. The refill ports are usually covered by a rubber seal or plug that needs to be removed before refilling.
Refer to the instructions provided with your refill kit for specific guidance on locating and accessing the refill ports for the Epson Ink Cartridge 200.
Step 3: Fill the Syringe
Open the ink bottles included in the refill kit and locate the syringe or other refilling tool. Carefully draw the appropriate ink color (black, cyan, magenta, or yellow) into the syringe, being cautious not to overfill or introduce air bubbles. Follow the instructions provided in the refill kit for the recommended amount of ink to be used.
Step 4: Inject the Ink
With the syringe filled with the appropriate ink color, carefully insert the needle into the refill port on the cartridge. Slowly and steadily inject the ink into the cartridge, following the instructions closely to ensure that you do not overfill or underfill the cartridge. Take your time and be patient during this step to avoid spills or leaks.
Step 5: Seal the Refill Port
Once the cartridge is filled with the correct amount of ink, use the provided sealant, plug, or tape to securely seal the refill port. This step is crucial to prevent ink leakage and ensure that the cartridge functions properly.
Step 6: Reinstall the Cartridge
Carefully reinsert the refilled cartridge into your printer, ensuring that it is properly seated and locked into place. Be gentle during this process to avoid damaging the cartridge or the printer.
Step 7: Run Print Head Cleaning Cycles
After reinstalling the refilled cartridge, it’s recommended to run a few print head cleaning cycles to ensure optimal print quality. Refer to your printer’s user manual or on-screen prompts for instructions on how to initiate and complete the print head cleaning process.
Related Article: How to Refill HP 67 Ink Cartridge
Method 2: Manual Syringe Refilling
If you prefer a more hands-on approach or don’t have access to a dedicated refill kit, you can manually refill the Epson Ink Cartridge 200 using a syringe and compatible ink bottles.
Step 1: Prepare the Cartridge
Start by removing the Epson Ink Cartridge 200 from your printer, following the same process as described in Method 1. Gently grasp the cartridge and pull it out of its slot, being careful not to touch the printhead or electrical contacts.
Place the cartridge on a clean, lint-free surface and inspect it for any cracks, leaks, or damage. If the cartridge appears to be in good condition, use a lint-free cloth or paper towel to gently wipe away any excess ink or debris from the cartridge’s surface.
Step 2: Locate the Refill Ports
Carefully examine the cartridge to locate the refill ports. These are typically small holes or indentations on the top or side of the cartridge.
If the refill ports are not easily accessible, you may need to use a sharp object, such as a needle or a paperclip, to carefully create a small opening in the refill port. Be cautious during this step to avoid damaging the cartridge.
Step 3: Fill the Syringe
Obtain compatible ink bottles in the desired colors (black, cyan, magenta, or yellow). Using a clean syringe or dropper, carefully draw the appropriate amount of ink from the ink bottle. Be cautious not to overfill the syringe or introduce air bubbles.
Step 4: Inject the Ink
With the syringe or dropper filled with the appropriate ink color, carefully insert it into the refill port on the cartridge. Slowly and steadily inject or drop the ink into the cartridge, being careful not to overfill or underfill the cartridge. Take your time and be patient during this step to avoid spills or leaks.
Step 5: Seal the Refill Port
Once the cartridge is filled with the correct amount of ink, use a sealant, such as a small piece of tape or a dab of glue, to securely seal the refill port. This step is crucial to prevent ink leakage and ensure that the cartridge functions properly.
Step 6: Reinstall the Cartridge
Carefully reinsert the refilled cartridge into your printer, ensuring that it is properly seated and locked into place. Be gentle during this process to avoid damaging the cartridge or the printer.
Step 7: Run Print Head Cleaning Cycles
After reinstalling the refilled cartridge, it’s recommended to run a few print head cleaning cycles to ensure optimal print quality. Refer to your printer’s user manual or on-screen prompts for instructions on how to initiate and complete the print head cleaning process.
Method 3: Using a Refill Clip (Advanced Method)
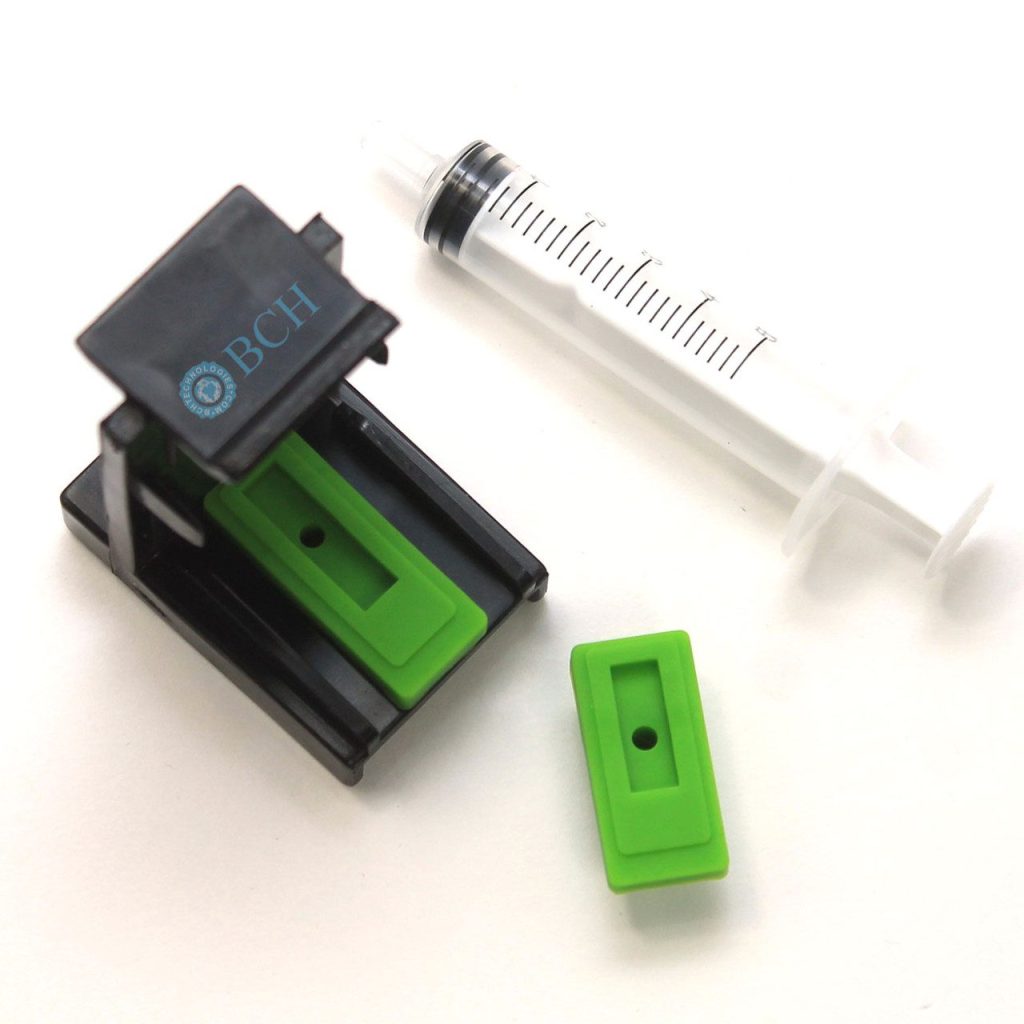
For those with more experience in refilling ink cartridges, using a refill clip can be an efficient and precise method for refilling the Epson Ink Cartridge 200.
Step 1: Prepare the Cartridge
Start by removing the Epson Ink Cartridge 200 from your printer, following the same process as described in the previous methods. Gently grasp the cartridge and pull it out of its slot, being careful not to touch the printhead or electrical contacts.
Place the cartridge on a clean, lint-free surface and inspect it for any cracks, leaks, or damage. If the cartridge appears to be in good condition, use a lint-free cloth or paper towel to gently wipe away any excess ink or debris from the cartridge’s surface.
Step 2: Install the Refill Clip
Obtain a refill clip specifically designed for the Epson Ink Cartridge 200. Carefully follow the instructions provided with the refill clip to properly install it on the cartridge.
This process typically involves removing a portion of the cartridge’s outer casing to expose the ink reservoir. Take your time and be gentle during this step to avoid damaging the cartridge.
Step 3: Fill the Cartridge
With the refill clip installed, use compatible ink bottles to carefully fill the cartridge’s ink reservoir through the refill clip. Follow the manufacturer’s instructions for the recommended ink levels and refilling process. Be cautious not to overfill or underfill the cartridge.
Step 4: Remove the Refill Clip
Once the cartridge is filled with the correct amount of ink, carefully remove the refill clip from the cartridge. Be gentle during this process to avoid spills or leaks.
Step 5: Seal the Cartridge
Depending on the design of the refill clip and the modifications made to the cartridge during installation, you may need to use a sealant, plug, or tape to seal any openings created during the refill process. This step is crucial to prevent ink leakage and ensure that the cartridge functions properly.
Step 6: Reinstall the Cartridge
Carefully reinsert the refilled cartridge into your printer, ensuring that it is properly seated and locked into place. Be gentle during this process to avoid damaging the cartridge or the printer.
Step 7: Run Print Head Cleaning Cycles
After reinstalling the refilled cartridge, it’s recommended to run a few print head cleaning cycles to ensure optimal print quality. Refer to your printer’s user manual or on-screen prompts for instructions on how to initiate and complete the print head cleaning process.
Related Article: How to Replace Ink Cartridge in HP Laserjet Pro MFP M428fdw
Conclusion
Refilling the Epson Ink Cartridge 200 can be a straightforward and cost-effective solution for those looking to reduce their printing expenses. Whether you choose to use a dedicated refill kit, manually refill with a syringe, or employ an advanced method like a refill clip, following the proper steps and best practices is crucial for a successful refilling process.
By mastering the art of refilling ink cartridges, you can not only save money but also contribute to a more sustainable printing practice. Remember, always use compatible ink, handle cartridges with care, and follow the instructions provided by the manufacturer or refill kit supplier to ensure optimal print quality and prolong the life of your printer.
Frequently Asked Questions (FAQs)
1. How do I change the ink in my Epson 200 printer?
To change the ink in your Epson 200 printer, follow these steps: First, open the printer’s cover to access the ink cartridge compartment.
Next, locate the cartridge that needs replacement and gently press the tab to release it. Carefully remove the old cartridge and dispose of it properly. Take the new cartridge out of its packaging, being careful not to touch the nozzle or electrical contacts.
Insert the new cartridge into the vacant slot, applying gentle pressure until it clicks into place. Finally, close the printer’s cover, and run a nozzle check to ensure the new cartridge is functioning correctly.
2. How do I check ink levels on my Epson XP 200 printer?
To check the ink levels on your Epson XP 200 printer, start by turning on the printer. On the control panel, look for the “Ink” or “Ink Levels” button and press it.
The printer will then initiate an ink level check and display the approximate remaining ink levels for each installed cartridge. Alternatively, you can check ink levels through the printer software on your connected computer.
Open the printer utility, navigate to the ink level monitoring section, and it will provide a visual representation of the cartridge ink levels. Keeping an eye on these levels allows you to plan for timely replacements and maintain optimal print quality.
3. How do you check the nozzle on Epson XP 200?
To check the nozzle on your Epson XP 200 printer, start by loading plain paper into the printer tray. Then, access the printer’s maintenance menu on the control panel or through the printer software on your computer.
Look for an option labeled “Nozzle Check” or “Print Head Nozzle Check” and select it. The printer will initiate a test print, which consists of a pattern made up of lines and blocks. Examine the printed pattern carefully for any gaps or missing segments, which would indicate clogged nozzles.
If the pattern looks complete and uniform, it means the nozzles are functioning correctly. Performing regular nozzle checks helps identify potential print head issues early on.

How to Install LH2612A Laser Toner Cartridge – Easy Steps to Follow
How to Replace Ink Cartridge in HP Laserjet Pro MFP M428fdw – Easy Steps
How to Change Toner Cartridge in Brother Printer MFC-L2750DW
About Author
Mark Kelly
This is Mark, a printer expert from North Carolina, US. It has been 8 years since I started using and reviewing printers of all types. With that said, I decided to share my knowledge with you lovely people so you can make the perfect choice when it comes to choosing a printer.