How to Print on Acrylic Sheet – 4 Easy Solutions

Printing on acrylic sheets has emerged as a captivating trend, offering a contemporary alternative to traditional printing surfaces.
This versatile material, also known as plexiglass, serves as a durable and visually striking canvas for a wide array of applications, from eye-catching signage to avant-garde artistic creations.
In this comprehensive guide, we’ll explore the intricacies of printing on acrylic sheets, equipping you with the knowledge and skills to achieve professional-quality results.
Acrylic sheets boast numerous advantages as a printing substrate, including their pellucid nature, lightweight properties, and resistance to shattering.
Whether you’re a business owner aiming to create attention-grabbing displays, an artist eager to experiment with novel mediums, or a DIY enthusiast ready to tackle an innovative project, mastering the art of acrylic printing can unlock a world of creative possibilities.
How to Print on Acrylic Sheet
Throughout this article, we’ll delve into multiple printing methods, discuss essential equipment and materials, and provide step-by-step instructions to guide you through the process.
Method 1: Direct Printing with UV Flatbed Printers

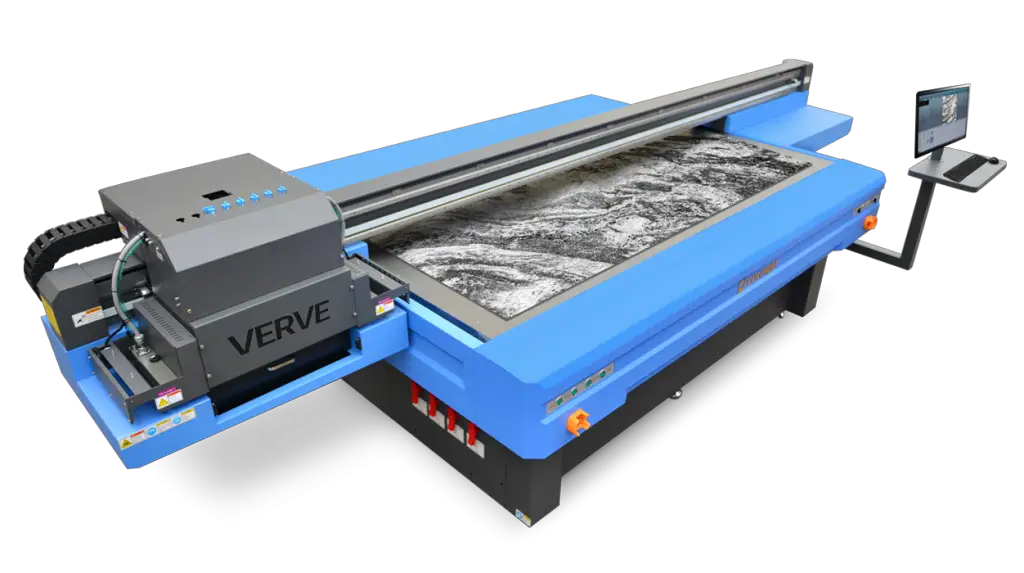
One of the most efficient and high-quality methods for printing on acrylic sheets is using a UV flatbed printer. This technology allows for direct printing onto the acrylic surface, producing vibrant, long-lasting results.
Step 1: Prepare the Acrylic Sheet
Begin by cleaning the acrylic sheet thoroughly to remove any dust, oils, or debris that could affect print quality. Use a lint-free cloth and isopropyl alcohol to wipe down the surface.
Step 2: Create Your Design
Using graphic design software, create or prepare your artwork for printing. Ensure that the design is sized correctly for your acrylic sheet and that the color mode is set to CMYK for accurate color reproduction.
Tip: Acrylic’s transparency can affect how colors appear. Consider this when designing and adjust your color profiles accordingly.
Step 3: Load the Acrylic Sheet
Carefully place the acrylic sheet onto the flatbed of the UV printer. Many printers have vacuum beds to hold the sheet in place securely.
Step 4: Adjust Printer Settings
Configure the printer settings according to the specific requirements of your acrylic sheet and design. This may include adjusting the print resolution, ink density, and curing intensity of the UV lamps.
Step 5: Perform a Test Print
Before committing to a full print, it’s advisable to perform a small test print on a corner of the acrylic sheet or a separate sample piece to ensure color accuracy and adhesion.
Step 6: Execute the Full Print
Once you’re satisfied with the test results, proceed with the full print. The UV printer will deposit ink directly onto the acrylic surface and immediately cure it using UV light.
Step 7: Post-Print Curing
Although the ink is cured during the printing process, some printers recommend an additional curing step. Follow the manufacturer’s guidelines for post-print curing to ensure maximum durability.
Step 8: Inspect and Clean
After the print is complete, carefully inspect the results for any imperfections. Clean any dust or debris that may have settled on the surface during printing.
Related Guide: How to Print Excel Sheets in A4 Size Full Page Landscape
Method 2: Screen Printing on Acrylic

Screen printing is another popular method for applying designs to acrylic sheets, particularly for larger quantities or when a more tactile finish is desired.
Step 1: Prepare Your Design
Create your design and separate it into individual color layers. Each color will require a separate screen.
Step 2: Create the Screens
Expose your design onto mesh screens coated with light-sensitive emulsion. Wash out the unexposed areas to create your stencils.
Step 3: Set Up the Printing Area
Secure your acrylic sheet to a flat, stable surface. Ensure you have all necessary materials, including ink, squeegees, and registration marks for multi-color designs.
Step 4: Apply Ink
Place the screen over the acrylic sheet and apply a line of ink along one edge of the screen. Use a squeegee to pull the ink across the screen, forcing it through the open areas onto the acrylic.
Note: Use inks specifically formulated for acrylic or plastic substrates to ensure proper adhesion and durability.
Step 5: Cure the Ink
Depending on the type of ink used, you may need to heat-cure the print. Follow the ink manufacturer’s recommendations for curing times and temperatures.
Step 6: Repeat for Additional Colors
If your design includes multiple colors, repeat steps 4 and 5 for each color layer, allowing sufficient drying time between applications.
Step 7: Final Curing
Once all colors have been applied, perform a final curing step to ensure the ink is fully set and durable.
Method 3: Digital Printing with Transfer Films

For those without access to specialized equipment, digital printing with transfer films offers a accessible method for printing on acrylic sheets.
Step 1: Select the Appropriate Transfer Film
Choose a transfer film compatible with your printer and suitable for application on acrylic. There are options for both inkjet and laser printers.
Step 2: Design Your Artwork
Create your design using graphic design software, ensuring it’s sized correctly and in the appropriate color mode for your printer.
Step 3: Print on the Transfer Film
Load the transfer film into your printer according to the manufacturer’s instructions. Print your design onto the film.
Step 4: Prepare the Acrylic Surface
Clean the acrylic sheet thoroughly with isopropyl alcohol to remove any contaminants that could interfere with adhesion.
Step 5: Apply the Transfer Film
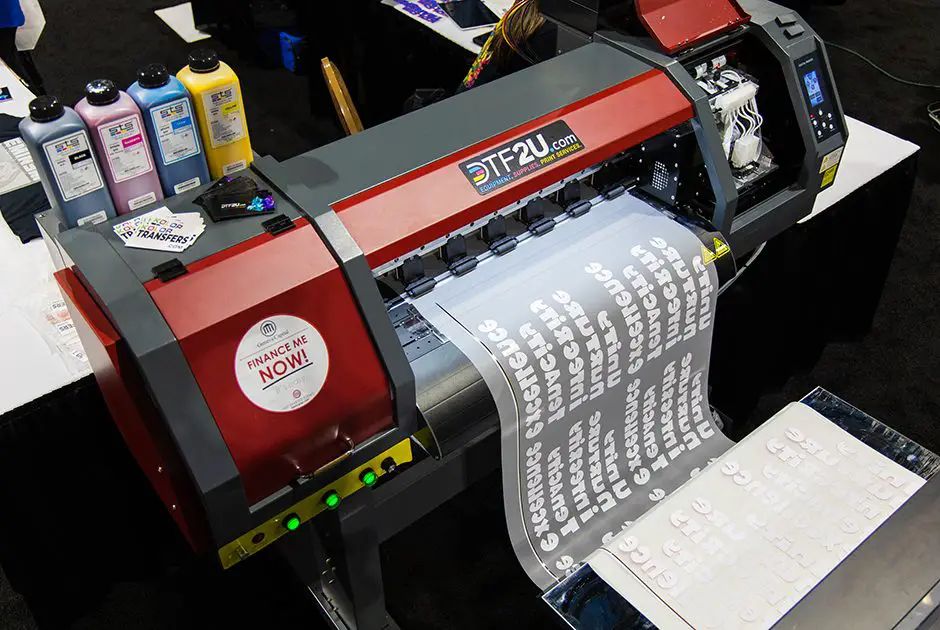
Carefully position the printed transfer film onto the acrylic sheet. Use a squeegee or roller to smooth out any air bubbles and ensure good contact between the film and the acrylic.
Step 6: Heat Application
Using a heat press or iron (if suitable for the specific transfer film), apply heat according to the film manufacturer’s instructions. This process bonds the ink to the acrylic surface.
Step 7: Cool and Peel
Allow the acrylic sheet to cool completely before carefully peeling away the transfer film, revealing your printed design on the acrylic.
Related Guide: How to Print White on Black Paper
Method 4: Reverse Printing for Second Surface Applications
Reverse printing is a technique used when you want to display the image through the acrylic sheet, protecting the print on the back side.
Step 1: Mirror Your Design
Using graphic design software, create a mirrored version of your artwork. This ensures it will appear correctly when viewed through the acrylic.
Step 2: Print on the Acrylic
Using one of the methods described earlier (UV printing or screen printing), apply the mirrored design to the back side of the acrylic sheet.
Step 3: Apply a Backing Layer
To protect the print and enhance its visibility, apply a white or metallic backing layer over the printed design. This can be done using screen printing with opaque ink or by adhering a vinyl backing.
Step 4: Optional Protective Coating
For added durability, consider applying a clear protective coating over the backing layer to seal and protect the print.
Note: When working with acrylic sheets, especially when cutting or finishing, always use appropriate safety equipment and follow proper handling procedures.
Conclusion
Printing on acrylic sheets offers a world of creative possibilities, from stunning signage and displays to unique art pieces and functional products.
By understanding the properties of acrylic and mastering various printing techniques, you can achieve professional-quality results that showcase your designs in a modern and durable medium.
Whether you opt for the precision of UV flatbed printing, the versatility of screen printing, the accessibility of transfer films, or the protective approach of reverse printing, each method has its advantages and considerations.
By carefully preparing your materials, selecting the appropriate inks and equipment, and paying attention to detail throughout the process, you can create eye-catching acrylic prints that stand the test of time.
As with any printing technique, practice and experimentation are key to refining your skills and achieving the best possible outcomes. Don’t be afraid to test different methods, materials, and finishing techniques to find the perfect combination for your specific project requirements.
With the knowledge and steps outlined in this guide, you’re well-equipped to embark on your acrylic printing journey. Whether you’re a professional printer looking to expand your services, an artist exploring new mediums, or a business owner seeking innovative display solutions, printing on acrylic sheets offers a unique and impactful way to bring your ideas to life.
Frequently Asked Questions (FAQs)
1. Can you print on an acrylic sheet?
Yes, you can print on acrylic sheets using various methods. UV printing is a popular technique that allows for vibrant, durable designs directly on the acrylic surface. Another option is screen printing, which works well for simpler designs and larger quantities.
For DIY projects, you can use acrylic-specific transfer papers and an inkjet printer. Some specialized printers can even print directly onto acrylic sheets. The choice of method depends on factors like the complexity of your design, quantity needed, and available equipment.
Printing on acrylic offers versatility for creating signs, displays, art pieces, and more, combining the material’s durability with customizable visual appeal.
2. What kind of printer do you need to print on acrylic?
To print on acrylic, you’ll need a specialized printer designed for this purpose. UV printers are the most common choice, as they use ultraviolet light to cure ink instantly on the acrylic surface. Flatbed UV printers are particularly suitable, allowing for printing on rigid materials.
Some eco-solvent printers can also handle acrylic sheets with proper preparation. For smaller projects, you might consider a modified inkjet printer with specialized inks.
Industrial-grade printers like those from Roland or Mimaki offer high-quality results for professional use. The ideal printer depends on your specific needs, including print volume, size requirements, and desired print quality.
3. How do you permanently print on acrylic?
To permanently print on acrylic, UV printing is the most reliable method. This technique uses ultraviolet light to cure special inks instantly, creating a durable bond with the acrylic surface. Another effective approach is screen printing, which works well for larger quantities and simpler designs.
For both methods, proper surface preparation is crucial – clean the acrylic thoroughly and consider using a primer for better adhesion. Some specialized techniques include direct digital printing with solvent-based inks or using heat transfer methods.
Regardless of the chosen method, it’s important to use inks specifically formulated for acrylic to ensure longevity. Always test your chosen method on a small area first to ensure satisfactory results.


