
How to Make 3D Printer Files – Easy Ways
In the rapidly evolving world of additive manufacturing, creating 3D printer files has become an essential skill for designers, engineers, and hobbyists alike. This comprehensive guide will walk you through the process of generating high-quality 3D printer files, exploring various methods and tools to bring your ideas to life.
Whether you’re a beginner or an experienced maker, this article will provide valuable insights into the art and science of preparing models for 3D printing.
Understanding 3D Printer Files
Before diving into the creation process, it’s crucial to understand what 3D printer files are and how they work. 3D printer files contain the instructions that tell a 3D printer how to construct a physical object layer by layer. The most common file format for 3D printing is STL (Stereolithography), although other formats like OBJ, AMF, and 3MF are also used.
These files represent 3D models as a collection of triangular facets, approximating the surface of the object. The more complex and detailed the model, the more triangles are needed to represent it accurately. However, this increased detail comes at the cost of larger file sizes and potentially longer processing times.
Choosing Your Method
There are several approaches to creating 3D printer files, each with its own advantages and limitations. The method you choose will depend on your skill level, the complexity of the object you want to create, and the tools at your disposal. Let’s explore the main methods:
- 3D Modeling Software
- 3D Scanning
- Parametric Modeling
- Photogrammetry
Method 1: 3D Modeling Software
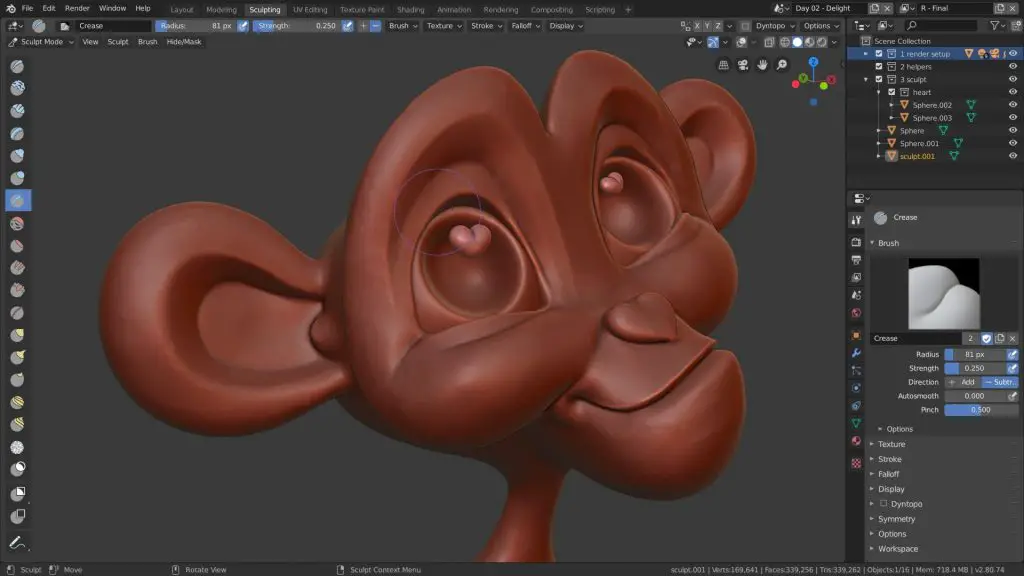
3D modeling software is the most versatile and widely used method for creating 3D printer files. This approach allows for complete creative control and precision in design.
Step 1: Choose your software
There are numerous 3D modeling software options available, ranging from beginner-friendly to professional-grade tools. Some popular choices include:
- Blender (free, open-source)
- Fusion 360 (free for personal use, paid for commercial)
- TinkerCAD (free, web-based)
- SolidWorks (professional, paid)
- Maya (professional, paid)
Select a software that matches your skill level and intended use.
Step 2: Learn the basics
Familiarize yourself with the software’s interface and basic tools. Most 3D modeling programs share common features such as:
- Primitive shapes (cubes, spheres, cylinders)
- Extrusion tools
- Boolean operations (union, difference, intersection)
- Subdivision and smoothing tools
Take advantage of online tutorials and documentation to get started.
Step 3: Create your model
Begin by sketching out your design on paper or in a 2D digital format. This will serve as a reference as you build your 3D model.
Start with basic shapes and gradually refine your model using more advanced tools. Pay attention to scale and proportions, ensuring your model is the correct size for 3D printing.
Step 4: Check for errors
Before exporting your file, check for common issues that can affect 3D printing:
- Non-manifold geometry (holes or gaps in the model)
- Inverted normals (surfaces facing the wrong direction)
- Overlapping or intersecting geometry
Many 3D modeling programs have built-in tools to detect and fix these issues.
Step 5: Export as STL
Once your model is complete and error-free, export it as an STL file. Most 3D modeling software will have an option to export or save as STL in the file menu.
Related Article: How to Connect HP OfficeJet Pro 8025e to WiFi
Method 2: 3D Scanning
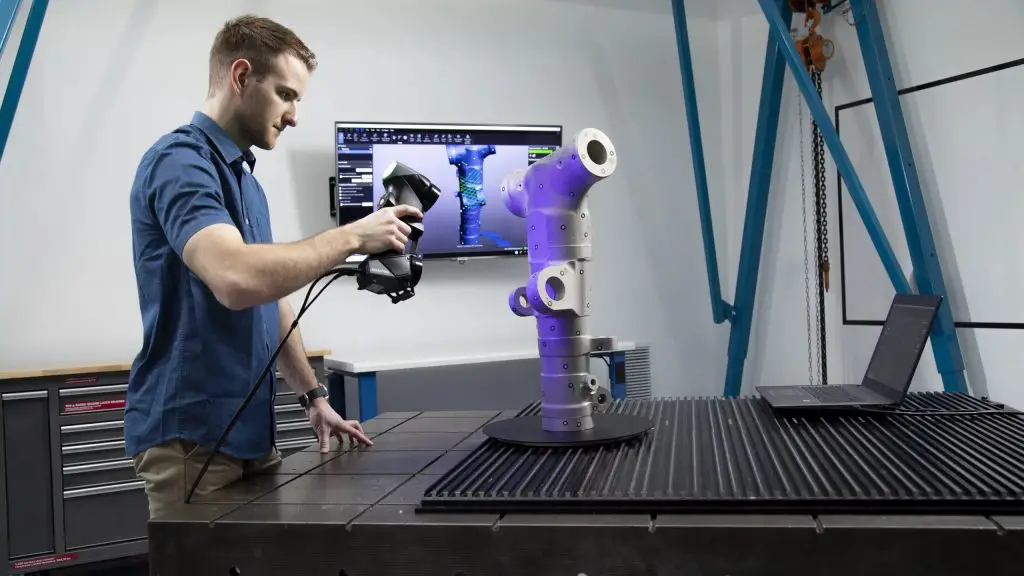
3D scanning is an excellent method for creating 3D printer files of existing physical objects. This approach is particularly useful for replicating or modifying real-world items.
Step 1: Choose a 3D scanner
There are several types of 3D scanners available:
- Structured light scanners
- Laser scanners
- Photogrammetry-based scanners
- Smartphone apps with 3D scanning capabilities
Select a scanner based on your budget and the level of detail required for your project.
Step 2: Prepare the object
Clean the object you want to scan and ensure it’s placed in a well-lit area. For best results, use a turntable to rotate the object during scanning.
Step 3: Perform the scan
Follow the manufacturer’s instructions for your specific scanner. Generally, you’ll need to:
- Calibrate the scanner
- Scan the object from multiple angles
- Combine the scans into a single 3D model
Step 4: Clean up the scan data
Raw scan data often contains imperfections and noise. Use 3D modeling software to:
- Remove artifacts and unwanted geometry
- Fill holes and gaps in the mesh
- Smooth the surface of the model
Step 5: Optimize for 3D printing
Adjust the model’s scale and orientation for optimal 3D printing. Ensure the model is manifold (watertight) and has the appropriate wall thickness for your intended printing method.
Step 6: Export as STL
Once your scanned model is cleaned up and optimized, export it as an STL file for 3D printing.
Method 3: Parametric Modeling

Parametric modeling is a powerful technique for creating precise, easily modifiable 3D printer files. This method is particularly useful for engineering and product design applications.
Step 1: Choose parametric modeling software
Some popular parametric modeling software options include:
- Fusion 360
- SolidWorks
- Onshape
- OpenSCAD
Step 2: Define parameters
Identify the key dimensions and relationships in your design. These will become the parameters that drive your model.
Step 3: Create a sketch
Start by creating a 2D sketch of your design. Use geometric constraints and dimensions to define the shape precisely.
Step 4: Add features
Use features like extrusion, revolution, and loft to transform your 2D sketch into a 3D model. Each feature should be based on the parameters you defined earlier.
Step 5: Create relationships
Establish relationships between different parts of your model. This ensures that changes to one parameter will automatically update related parts of the design.
Step 6: Test and refine
Adjust your parameters to test different variations of your design. Refine the model as needed to achieve the desired result.
Step 7: Export as STL
Once you’re satisfied with your parametric model, export it as an STL file for 3D printing.
Related Article: How to Print on 4×6 Cardstock
Method 4: Photogrammetry
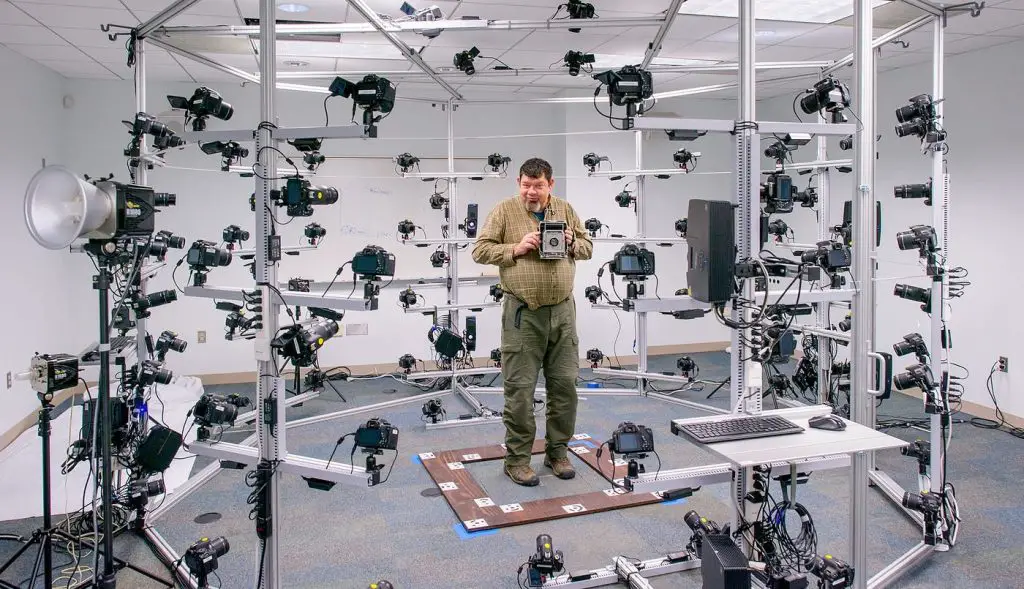
Photogrammetry is a technique that uses multiple 2D photographs to create a 3D model. This method can be a cost-effective alternative to 3D scanning for capturing real-world objects.
Step 1: Choose photogrammetry software
There are several photogrammetry software options available:
- Agisoft Metashape
- RealityCapture
- Meshroom (free, open-source)
- 3DF Zephyr
Step 2: Photograph the object
Take multiple photographs of the object from various angles. Ensure:
- Good lighting conditions
- High contrast between the object and background
- Overlap between adjacent photos
- Consistent focus and exposure
Step 3: Import photos into software
Load your photographs into your chosen photogrammetry software.
Step 4: Generate point cloud
The software will analyze the photos to create a point cloud, which represents the 3D structure of the object.
Step 5: Create mesh
Convert the point cloud into a 3D mesh. This step may involve:
- Cleaning up noise and outliers
- Adjusting mesh density
- Filling holes in the mesh
Step 6: Texture the model
If desired, apply textures to your 3D model based on the original photographs.
Step 7: Optimize for 3D printing
Prepare the model for 3D printing by:
- Scaling to the correct size
- Orienting the model for optimal printing
- Checking and fixing any non-manifold geometry
Step 8: Export as STL
Export your photogrammetry-generated model as an STL file for 3D printing.
Best Practices for Creating 3D Printer Files
Regardless of the method you choose, following these best practices will help ensure your 3D printer files produce high-quality prints:
- Design with 3D printing in mind: Consider the limitations of your 3D printer, such as minimum feature size and maximum build volume.
- Maintain proper wall thickness: Ensure your model’s walls are thick enough to be printed successfully. This typically ranges from 0.8mm to 2mm, depending on your printer and material.
- Use appropriate tolerances: For parts that need to fit together, design with proper clearances to account for the printer’s accuracy and material properties.
- Minimize overhangs: Design your model to minimize overhangs greater than 45 degrees, or incorporate support structures where necessary.
- Orient your model correctly: Position your model to minimize support material and optimize surface quality.
- Check for manifold geometry: Ensure your model is “watertight” with no holes or gaps in the mesh.
- Optimize polygon count: Balance detail with file size by using an appropriate number of polygons for your model’s complexity.
- Test print: When possible, create a small test print to verify your design before committing to a full-size print.
Advanced Techniques
As you become more proficient in creating 3D printer files, consider exploring these advanced techniques:
- Multi-material design: Create models with multiple materials or colors for use with multi-extruder printers.
- Generative design: Use AI-powered tools to optimize your designs for specific performance criteria.
- Topology optimization: Reduce material usage while maintaining structural integrity through advanced optimization algorithms.
- Lattice structures: Incorporate lightweight, strong internal structures to improve your model’s performance.
- Texture mapping: Apply detailed surface textures to your 3D models for enhanced visual appeal.
- Simulation and analysis: Use finite element analysis (FEA) tools to test your design’s performance before printing.
Troubleshooting Common Issues
Even with careful preparation, you may encounter issues when creating 3D printer files. Here are some common problems and their solutions:
- Non-manifold geometry: Use mesh repair tools in your 3D modeling software or dedicated programs like Netfabb or MeshMixer to fix holes and intersecting geometry.
- Inverted normals: Most 3D modeling software has tools to recalculate or flip normals. Ensure all surfaces are facing outward.
- Thin walls: Increase wall thickness to meet your printer’s minimum requirements, typically at least two times the nozzle diameter.
- Floating parts: Connect separate parts of your model or adjust their position to ensure all elements are grounded.
- Poor surface quality: Increase the polygon count in areas with high curvature, or use subdivision surfaces for smoother results.
- Large file sizes: Optimize your model by reducing polygon count in less detailed areas or using decimation tools.
- Scaling issues: Always check your model’s dimensions before exporting, and use the correct units (mm, inches) consistently.
Conclusion
Creating high-quality 3D printer files is a skill that combines technical knowledge with creativity. Whether you’re using 3D modeling software, 3D scanning, parametric modeling, or photogrammetry, the key to success lies in understanding the principles of 3D design and the limitations of 3D printing technology.
As you practice and refine your skills, you’ll develop an intuition for what makes a good 3D printable model. Remember to stay current with new software tools and techniques, as the field of 3D printing is constantly evolving.
By following the methods and best practices outlined in this guide, you’ll be well-equipped to create impressive 3D printer files that bring your ideas to life. Whether you’re prototyping a new product, creating custom parts, or exploring artistic expression through 3D printing, the ability to generate high-quality 3D printer files will prove invaluable in your maker journey.
How to Store 3D Printer Filament – Easy Steps to Follow
How to Scan an Object for 3D Printing – Easy Ways to Follow
How to Tighten 3D Printer Belt – A Detailed Step-by-Step Guide
About Author
Mark Kelly
This is Mark, a printer expert from North Carolina, US. It has been 8 years since I started using and reviewing printers of all types. With that said, I decided to share my knowledge with you lovely people so you can make the perfect choice when it comes to choosing a printer.