
How to Fix Paper Jam in Epson Printer – Easy Steps to Follow
Are you looking for solutions on how to fix paper jam in Epson printer? In that case, you don’t need to search anymore because we are here to help you out. This guide will outline a detailed method that you can follow to solve the problem.
How to Fix Paper Jam in Epson Printer
It does not matter what printer type you are using, dealing with a paper jam is always an annoying thing to face, and fixing it is not always as easy as it seems.
It can be incredibly frustrating at times because you are looking forward to an important printout and suddenly you start seeing the printer grinding to a halt.
When the same scenario is experienced by Epson printer users, they tend to have more problems than other printer users.
So, if you are also one of those Epson printer users who is going through this issue then there is no need to worry at all because we have got you covered.
In this guide, we are going to cover a comprehensive method that you can use to get this problem over the line and start printing without any paper jams. Before losing any further time, it is time to delve into the method.
Steps for Fixing Paper Jam in Epson Printer
Whenever you encounter a paper jam on your printer, follow the step-by-step instructions given below to get the job done.
Step 1: The very first thing you need to do is cancel the print job that your printer is performing immediately. For this, you have to press the Cancel button on your Epson printer. Some models have the Stop button instead of Cancel.
Note: You can also stop the print job by accessing the print queue on your computer but it comes with the downside that it is a bit consuming.
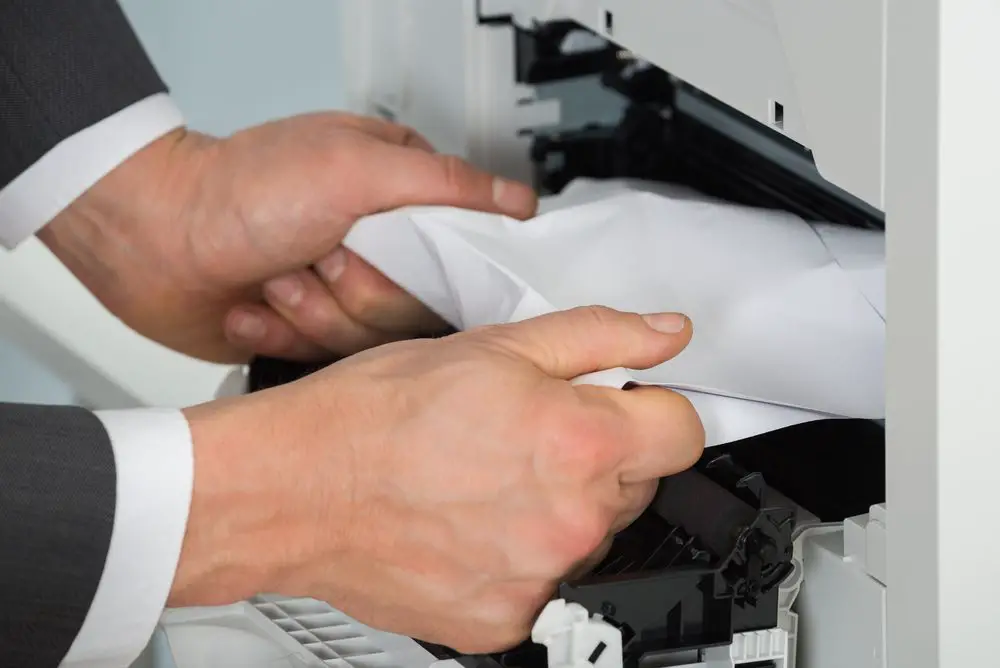
Step 2: The next step is to remove any paper stuck inside the printer. The paper can be stuck in different parts of the printer. These include the paper tray area, inside of the top cover, behind the back cover, the paper output tray, and the duplex unit.
If you find any pieces of paper stuck in these areas, you need to remove them gently by using the most suitable tool depending on the build of that part. Keep in mind that tearing the pieces will only get things in a worse place.
Step 3: After you are done with the cleaning process, you have to inspect the paper path in a thorough manner to make sure there are no scraps left as they can cause further jams.
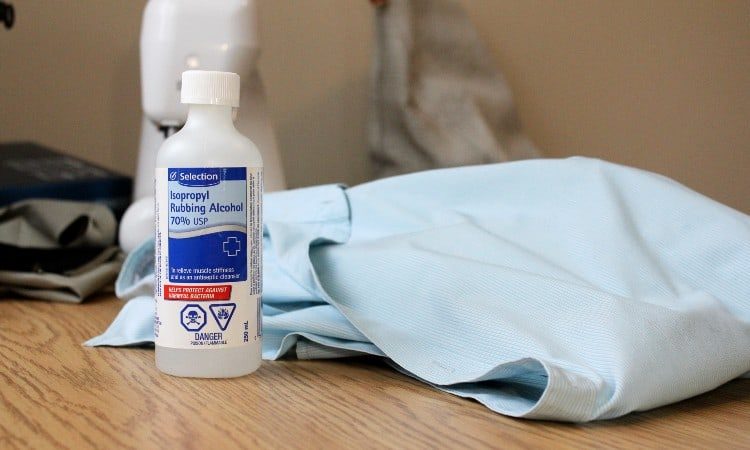
Step 4: When you have made sure that there are no pieces left, take a piece of soft cloth and use it to clean the paper path. Dipping it in isopropyl alcohol will be the icing on the cake if possible but in that case, let the printer get dry for a good half an hour.
Step 5: Now that the cleaning and removal of paper is done, it is time to close the paper tray of your Epson printer.
Step 6: The next thing you need to do is reset the printer. For this, you can follow the procedure for your particular Epson printer model. Resetting the printer is pivotal because the printer will function much smoother this way.
Factory reset is also an option on the table but your saved data will be removed and the customizations made will be restored to default in that case.
Step 7: Finally, take a few plain sheets and insert them into the paper tray of your printer. Print any random document to ensure smooth flow of the prints and if that is what happened then you are ready to proceed.
And well done, you have fixed the paper jam on your Epson printer successfully at last. Now, you can start printing again without facing any paper jams.
For further details on the issue, refer to the user manual of your printer. Usually, there is a guide on handling paper jams professionally.
Related Article: How to Print Labels on Konica Minolta Printer
Conclusion
You can reduce the chances of paper jams occurring again to basically zero if you follow the right procedures and get your printer to function smoother than ever before.
This will be it for the guide on how to fix paper jams in an Epson printer. Following the steps listed in this guide will ensure that you don’t face any paper jams for a considerable period of time.
Frequently Asked Questions (FAQs)
1. How do I get rid of paper jam on my Epson printer?
In order to get rid of paper jam on your Epson printer, you have to perform a few simple steps. First of all, turn off the printer and disconnect the power supply of the printer.
Then, pull out the paper tray or the paper cassette out of the printer and start looking for any jammed paper. Remove the paper with the appropriate tools like tweezers and clean the printer. When done with this, turn on the printer again and it should be working just perfectly.
2. How do you fix Epson printer that won’t feed paper?
To fix an Epson printer that won’t feed paper, you need to follow a simple process. Usually, issues like these are related to the placement of the sheets in the printer’s paper tray.
So, take the sheets out of the tray and place them again with perfect alignments. Refer to the user manual for obtaining the notations pertaining to the placement. Also, keep in mind to not put a crazily high number of sheets in the tray. Doing this will fix the issue in most cases.
3. How do I fix a paper jam on my Epson l3110?
Fixing the paper jam on your Epson l3110 printer is no different from doing it on any other Epson printer. The main reason for this is that the fundamentals always remain the same. So, to start things off, you need to power off the printer and access the paper tray.
Remove any jammed paper you see and clean the rollers as well as the areas surrounding thoroughly with a clean cloth. Turn on the printer and reset it.
4. What causes paper jam in Epson printer?
Well, there can be a multitude of reasons behind the paper jam in an Epson printer. Some of the most common causes are the following.
Using damaged rollers, overloading the paper tray, loading sheets size or type incompatible with your particular printer model, using extra-thick paper sheets, and not maintaining/cleaning the printer on a regular basis, etc.
How to Find Fax Number on Ricoh Printer – 2 Easy Ways to Follow
How to Print Screen on Logitech Keyboard K850 – Easy Steps
How to Put 3D Print Files on SD Card – 3 Easy Methods to Follow
About Author
Mark Kelly
This is Mark, a printer expert from North Carolina, US. It has been 8 years since I started using and reviewing printers of all types. With that said, I decided to share my knowledge with you lovely people so you can make the perfect choice when it comes to choosing a printer.