
How to Check Ink Levels on Epson ET-2760 – Easy Ways
The Epson ET-2760 is a game-changer in the world of home and small office printing. With its innovative EcoTank system, this printer offers a cost-effective and eco-friendly solution for all your printing needs.
But like any tool, it requires a bit of attention to keep it running smoothly. One of the most crucial aspects of maintaining your ET-2760 is keeping tabs on those all-important ink levels.
In this guide, we’ll walk you through the ins and outs of checking ink levels on your Epson ET-2760. Whether you’re a tech whiz or just getting started with your new printer, we’ve got you covered.
We’ll explore a variety of methods, from the straightforward control panel checks to more sophisticated software solutions.
By the end of this article, you’ll be well-equipped to monitor your ink levels with confidence, ensuring your printing projects never hit an unexpected snag due to depleted ink reserves.
How to Check Ink Levels on Epson ET-2760
So, let’s dive in and demystify the process of checking ink levels on your Epson ET-2760. Let’s begin by exploring the most straightforward method: using the printer’s control panel.
Method 1: Using the Printer’s Control Panel
The Epson ET-2760’s control panel provides a quick and easy way to check your ink levels directly from the printer itself. This method is ideal for users who prefer a hands-on approach or don’t always have access to a computer.
Step 1: Access the Home Screen
Turn on your Epson ET-2760 printer and wait for it to initialize. Once ready, you should see the home screen on the LCD display.
Step 2: Navigate to the Settings Menu
Using the arrow buttons on the control panel, navigate to the “Settings” icon, which typically resembles a gear or wrench. Press the OK button to enter the Settings menu.
Step 3: Select “Maintenance”
In the Settings menu, scroll down until you find the “Maintenance” option. Press OK to enter the Maintenance submenu.
Step 4: Choose “Ink Levels”
Within the Maintenance submenu, locate and select the “Ink Levels” option. Press OK to view your current ink levels.
Step 5: Interpret the Ink Level Display
The printer will now display a graphical representation of your ink levels for each color (Cyan, Magenta, Yellow, and Black). The bars or indicators will show you approximately how much ink remains in each tank.
Step 6: Exit the Ink Levels Screen
Once you’ve reviewed your ink levels, press the back or home button to return to the main screen.
This method provides a quick snapshot of your ink levels without the need for additional software or devices. However, keep in mind that these readings are approximate and may not be as precise as other methods we’ll discuss later in this article.
Method 2: Using Epson Status Monitor (Windows)
For Windows users, Epson provides a built-in utility called Epson Status Monitor that offers a more detailed view of your printer’s ink levels. This method is ideal for those who frequently use their computer for printing tasks.
Step 1: Open the Control Panel
Click on the Windows Start button and type “Control Panel” in the search bar. Select “Control Panel” from the search results to open it.
Step 2: Navigate to Devices and Printers
In the Control Panel, find and click on “Devices and Printers” or “View devices and printers”, depending on your Windows version.
Step 3: Locate Your Epson ET-2760 Printer
In the Devices and Printers window, find the icon for your Epson ET-2760 printer. Right-click on the printer icon.
Step 4: Select Printing Preferences
From the context menu that appears, choose “Printing Preferences”.
Step 5: Access the Maintenance Tab
In the Printing Preferences window, click on the “Maintenance” tab at the top.
Step 6: Click on “EPSON Status Monitor 3”
Look for the “EPSON Status Monitor 3” button on the Maintenance tab and click it.
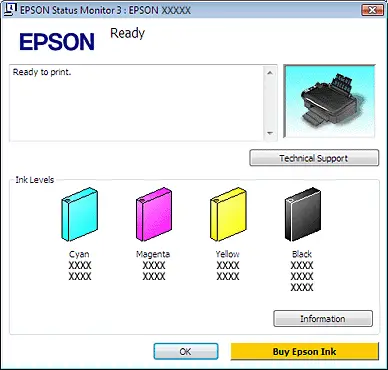
Step 7: View Ink Levels
The EPSON Status Monitor 3 window will open, displaying detailed information about your printer, including graphical representations of your ink levels for each color.
Step 8: Interpret the Results
The Status Monitor provides more precise ink level readings compared to the printer’s control panel. It may also offer estimates on how many pages you can print with the remaining ink.
Step 9: Close the Status Monitor
Once you’ve reviewed your ink levels, close the Status Monitor and Printing Preferences windows.
This method offers a more detailed view of your ink levels and can be particularly useful for monitoring ink consumption over time.
Related Article: How to Power Clean Epson ET-2760
Method 3: Using Epson Printer Utility (Mac)
Mac users can check ink levels using the Epson Printer Utility, which provides similar functionality to the Windows Status Monitor.
Step 1: Open System Preferences
Click on the Apple menu in the top-left corner of your screen and select “System Preferences”.
Step 2: Select Printers & Scanners
In the System Preferences window, click on “Printers & Scanners”.
Step 3: Choose Your Epson ET-2760
From the list of printers on the left side of the window, select your Epson ET-2760 printer.
Step 4: Click on Options & Supplies
With your printer selected, click on the “Options & Supplies” button.
Step 5: Open Utility Tab
In the new window that appears, click on the “Utility” tab.
Step 6: Launch Printer Utility
Click on the “Open Printer Utility” button to launch the Epson Printer Utility.
Step 7: Select EPSON Status Monitor
In the Printer Utility window, click on “EPSON Status Monitor”.
Step 8: View Ink Levels
The Status Monitor will display your current ink levels for each color, along with any relevant warnings or messages about your printer’s status.
Step 9: Analyze the Results
Take note of the ink levels and any additional information provided by the Status Monitor.
Step 10: Close the Utility
Once you’ve reviewed the information, close the Status Monitor and Printer Utility windows.
The Epson Printer Utility for Mac offers a comprehensive view of your printer’s status, including accurate ink level readings and potential maintenance alerts.
Method 4: Using the Epson Smart Panel Mobile App

For users who prefer a mobile solution, Epson offers the Smart Panel app, which allows you to check ink levels and perform various printer functions from your smartphone or tablet.
Step 1: Download and Install Epson Smart Panel
Visit your device’s app store (Google Play Store for Android or App Store for iOS) and search for “Epson Smart Panel”. Download and install the app on your mobile device.
Step 2: Launch the App
Open the Epson Smart Panel app on your mobile device.
Step 3: Connect to Your Printer
Follow the app’s instructions to connect to your Epson ET-2760 printer. This typically involves ensuring both your mobile device and printer are on the same Wi-Fi network.
Step 4: Select Your Printer
Once connected, select your Epson ET-2760 from the list of available printers in the app.
Step 5: View the Printer Dashboard
The app will display a dashboard with various printer information and options.
Step 6: Check Ink Levels
Look for the ink level indicators on the dashboard. These will show you the approximate levels for each color.
Step 7: Access Detailed Ink Information
Tap on the ink level section to view more detailed information about your ink status, including estimated page yields.
Step 8: Set Up Notifications (Optional)
Consider setting up low ink notifications in the app settings to receive alerts when your ink levels are running low.
Step 9: Exit the App
Once you’ve reviewed your ink levels, you can exit the app or leave it running in the background for quick future checks.
The Epson Smart Panel app provides a convenient way to monitor your ink levels remotely and offers additional features like remote printing and scanner control.
Related Article: How to Print Screen on Logitech Keyboard K780
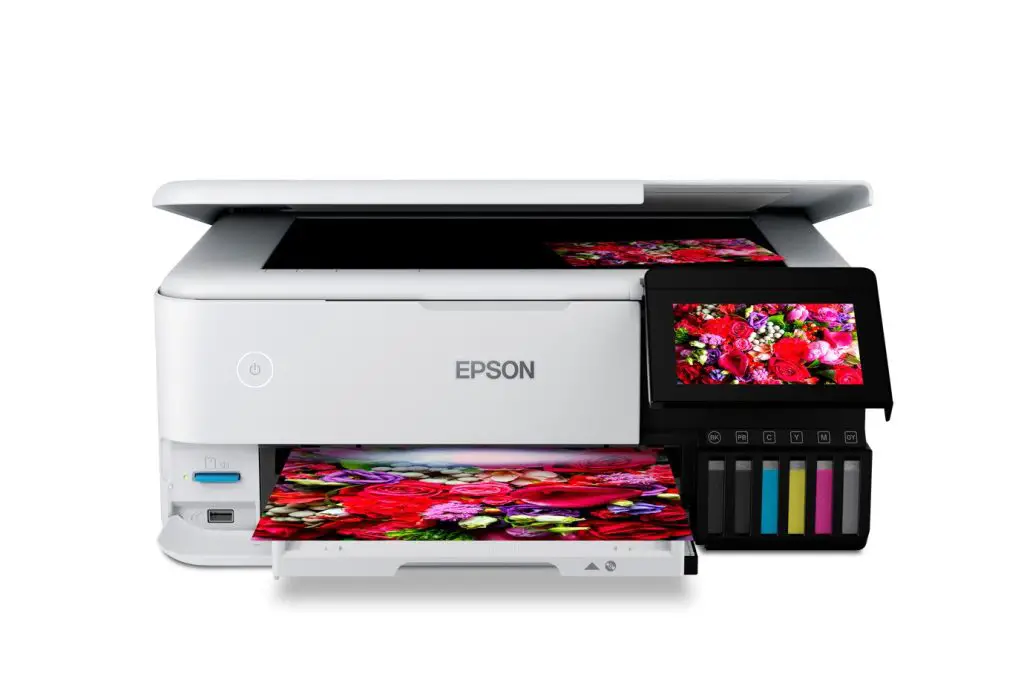
Method 5: Visual Inspection of Ink Tanks
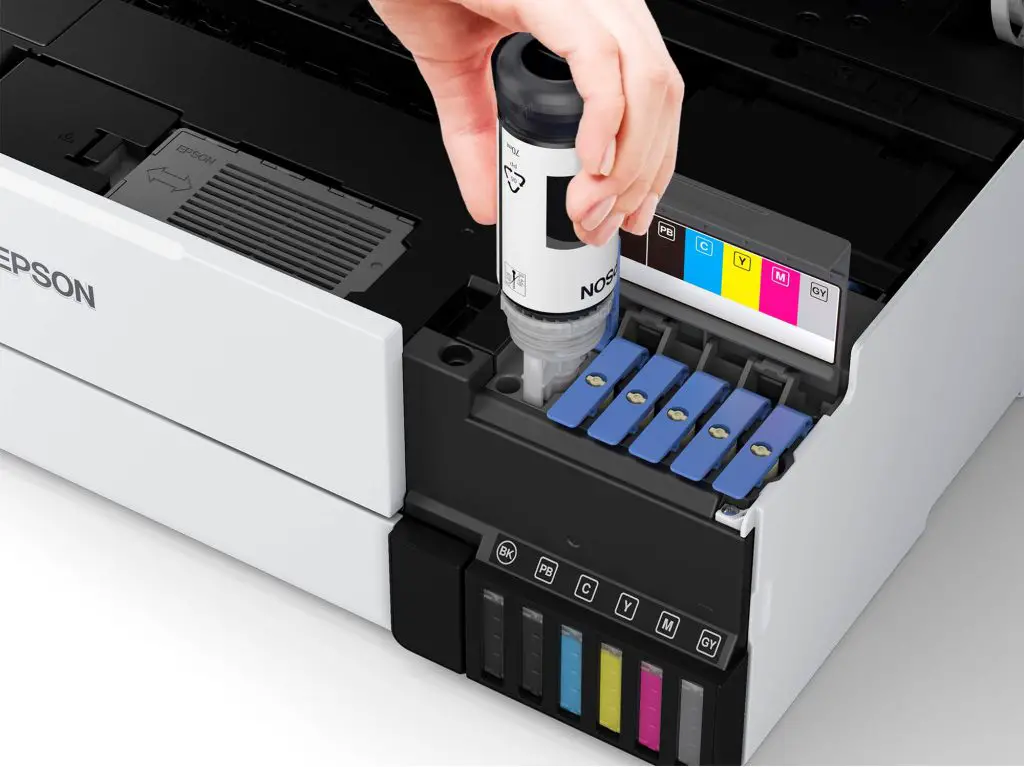
While less precise than digital methods, a visual inspection of the ET-2760’s ink tanks can provide a quick estimate of your remaining ink levels.
Step 1: Locate the Ink Tank Section
Find the ink tank section on your Epson ET-2760. It’s typically located on the right side of the printer and should be visible through a clear window.
Step 2: Open the Ink Tank Cover
Carefully open the cover protecting the ink tanks to get a clearer view.
Step 3: Observe Ink Levels
Look at each of the four ink tanks (Cyan, Magenta, Yellow, and Black) and observe the ink levels. The tanks are transparent, allowing you to see the actual ink inside.
Step 4: Compare to Fill Lines
Each tank has marked lines indicating maximum and minimum fill levels. Compare the current ink level to these lines to gauge how much ink remains.
Step 5: Check for Low Ink
Pay particular attention to any tanks that appear to be nearing the minimum fill line, as these may need refilling soon.
Step 6: Look for Air Bubbles
Check for any large air bubbles in the ink tanks. While small bubbles are normal, large ones might affect ink flow and print quality.
Step 7: Close the Ink Tank Cover
Once you’ve completed your visual inspection, carefully close the ink tank cover.
Step 8: Consider Refilling
If any tanks are approaching the minimum line, consider purchasing ink refills to have on hand for when they’re needed.
Note: While visual inspection is quick and doesn’t require any special tools or software, it’s important to note that it’s not as accurate as digital methods and should be used in conjunction with other techniques for the best results.
Conclusion
Monitoring ink levels on your Epson ET-2760 is essential for maintaining consistent print quality and avoiding unexpected interruptions in your printing tasks. By utilizing a combination of the methods outlined in this guide, you can ensure that you always have an accurate understanding of your printer’s ink status.
Digital methods like using the printer’s control panel, Epson Status Monitor, or the Smart Panel mobile app provide the most accurate readings and should be your primary means of checking ink levels. Visual inspection and nozzle checks can serve as supplementary methods, offering quick estimates and insights into potential print quality issues.
Remember to check your ink levels regularly, especially before starting large print jobs. By staying proactive in monitoring your ink levels, you can plan refills in advance and take full advantage of the Epson ET-2760’s cost-effective EcoTank system.
Lastly, always use genuine Epson ink refills to ensure the best print quality and to protect your printer’s warranty. With these techniques and best practices, you’ll be well-equipped to manage your Epson ET-2760’s ink levels efficiently, ensuring smooth and uninterrupted printing for all your needs.
Frequently Asked Questions (FAQs)
1. How do I reset the ink on my Epson ET-2760?
To reset the ink levels on your Epson ET-2760 printer, start by accessing the printer’s control panel. Navigate to the “Setup” or “Maintenance” menu and select “Reset Ink Levels” or a similar option. Choose the ink tank you want to reset and confirm when prompted.
Alternatively, you can use the Epson printer software on your computer. Open the Epson printer utility, find the “Maintenance” or “Ink Levels” tab, and look for an option to reset ink levels.
Follow the on-screen instructions to complete the process. Always ensure you’ve actually refilled the ink before resetting to avoid printing issues.
For more details, you can check out our comprehensive guide on how to reset Epson ET-2760 where we also go over a method for resetting ink levels.
2. How do I manually check ink levels on my printer?
To manually check ink levels on your printer, start by accessing the printer’s control panel or display screen. Look for an ink or maintenance menu option, which often shows ink levels visually. If your printer lacks a display, check for ink level indicator lights on the device itself.
Alternatively, use your computer by opening the printer software or utility program that came with your device. Look for an option to view ink or supply levels. For a more hands-on approach, you can carefully remove and inspect the ink cartridges, checking for any transparent sections that show remaining ink.
Remember, these methods may vary depending on your printer model, so consult your user manual for specific instructions.
3. How do I fix my Epson printer not reading ink?
If your Epson printer isn’t reading ink, try these troubleshooting steps. First, ensure the cartridges are properly installed and seated correctly. Clean the cartridge contacts using a lint-free cloth slightly dampened with distilled water.
Run a nozzle check and print head cleaning cycle from your printer’s maintenance menu. Update your printer’s firmware and drivers to the latest versions. If using third-party cartridges, try genuine Epson ones to rule out compatibility issues.
Check for any error messages on the printer display or computer and follow specific instructions. If the problem persists, reset the printer by unplugging it for a few minutes, then reconnecting. As a last resort, contact Epson support for further assistance.
How to Fix Paper Jam in Epson Printer – Easy Steps to Follow
How to Fix Brother Printer Printing Blank Pages – 2 Easy Ways
How to Scan on Kyocera Printer – 2 Easy Ways to Follow
About Author
Mark Kelly
This is Mark, a printer expert from North Carolina, US. It has been 8 years since I started using and reviewing printers of all types. With that said, I decided to share my knowledge with you lovely people so you can make the perfect choice when it comes to choosing a printer.