
How to Change Print Speed on Ender 3 – Easy Steps to Follow
3D printing has become increasingly popular in recent years, allowing hobbyists and professionals alike to create intricate designs and prototypes with relative ease. One of the most widely used 3D printers is the Ender 3, a budget-friendly and versatile machine from Creality.
However, as with any 3D printer, adjusting the print speed can be crucial for achieving desired results. In this comprehensive guide, we’ll explore various methods to change the print speed on your Ender 3, ensuring you can optimize your printing process for different materials, designs, and quality requirements.
Print speed is one of the most critical factors influencing the quality of your 3D prints. It determines how quickly the printer’s extruder moves, depositing molten filament onto the build plate. Faster print speeds can save time but may compromise print quality, while slower speeds generally yield better results but take longer to complete. Finding the right balance between speed and quality is essential for successful 3D printing.
How to Change Print Speed on Ender 3
The Ender 3 offers several methods to adjust the print speed, ranging from direct adjustments through the printer’s control panel to modifying settings in the slicing software.
Understanding these methods will empower you to fine-tune your printing process, ensuring consistent and reliable results every time.
Method 1: Adjusting Print Speed via the Ender 3 Control Panel
One of the most straightforward ways to change the print speed on your Ender 3 is through the printer’s control panel. This method is particularly useful when you need to make quick adjustments during an active print job.
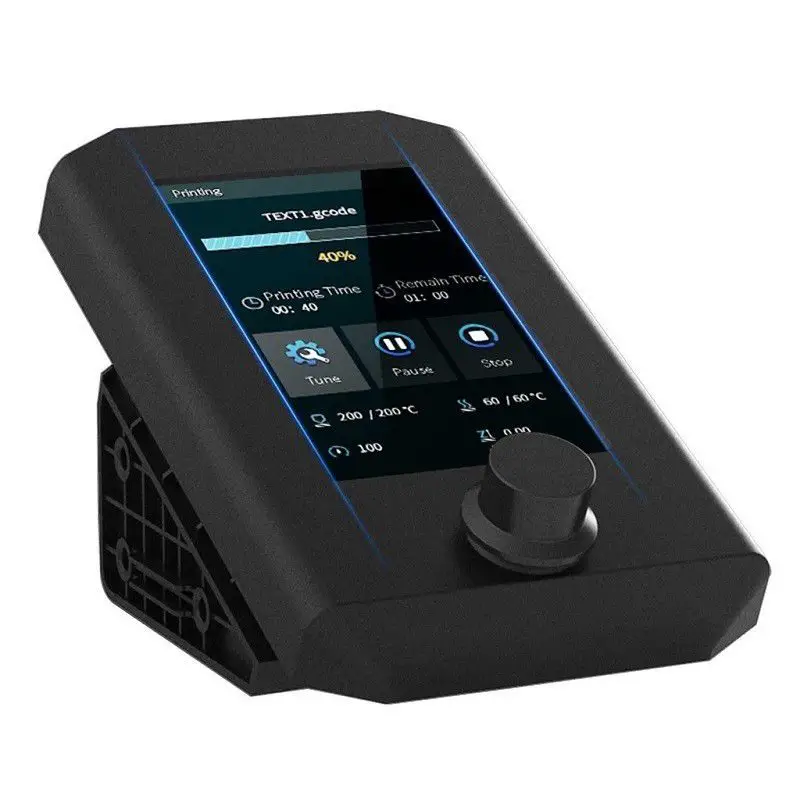
Step 1: Navigate to the Control Panel
Locate the control panel on your Ender 3, typically positioned on the right side of the printer. The control panel consists of a small LCD screen and a rotary knob with a button in the center.
Step 2: Access the Print Speed Settings
While the print is in progress, use the rotary knob to navigate through the menu options until you find the “Tune” or “Adjust” option. Press the knob to select this option.
Step 3: Adjust the Print Speed
Within the “Tune” or “Adjust” menu, you should see an option labeled “Speed” or something similar. Select this option and use the rotary knob to increase or decrease the print speed percentage. The default speed is typically 100%.
Step 4: Confirm the Change
Once you’ve adjusted the speed to your desired value, press the knob to confirm the change. The printer will immediately adjust the print speed accordingly.
It’s important to note that adjusting the print speed through the control panel is a temporary solution. If you need to change the print speed for future prints or want to set a new default speed, you’ll need to modify the settings in your slicing software.
Related Article: How to Change Toner Cartridge in Brother Printer MFC-L2750DW
Method 2: Modifying Print Speed in Slicing Software
While the Ender 3 control panel offers a convenient way to adjust print speed on the fly, most users prefer to set their desired print speeds before starting a print job.
This can be done by modifying the settings in the slicing software, which prepares your 3D model for printing by generating the necessary instructions (G-code) for the printer.
Step 1: Load Your 3D Model into the Slicing Software
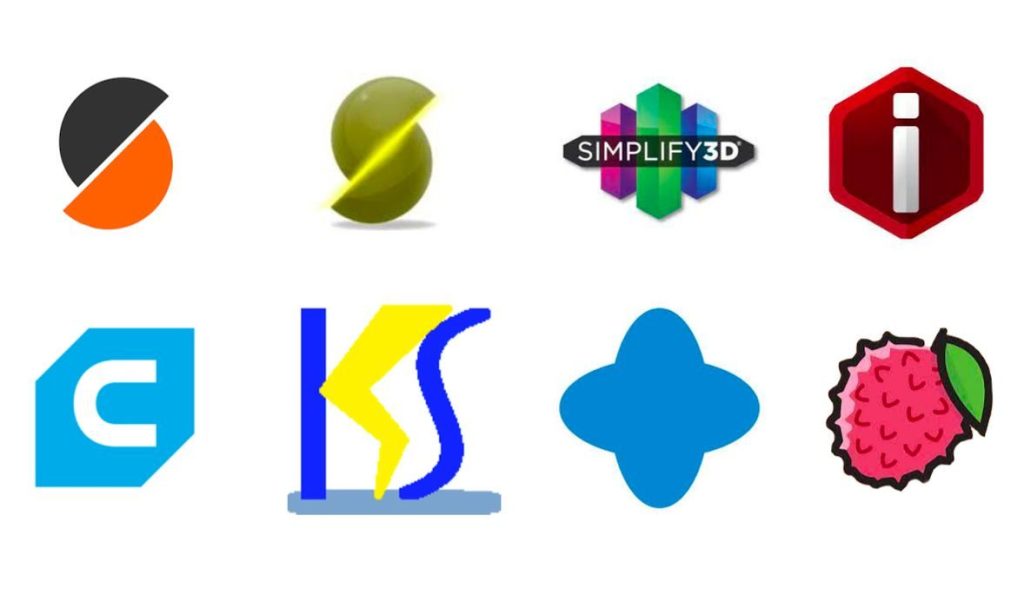
Open your preferred slicing software, such as Cura, Simplify3D, or Slic3r, and load your 3D model file (typically in STL or OBJ format).
Step 2: Access the Print Speed Settings
Locate the print speed settings within your slicing software. The exact location and terminology may vary, but it’s usually found under a category like “Speed” or “Speed Settings”.
Step 3: Adjust Print Speeds for Different Print Stages
Most slicing software allows you to adjust print speeds for different stages of the printing process, such as:
- Print Speed: This setting controls the overall speed at which the printer deposits filament during the main part of the print.
- Initial Layer Speed: This setting determines the speed for the initial layer, which is typically slower to ensure proper adhesion to the build plate.
- Outer Wall Speed: This setting controls the speed for printing the outer walls of your model, which may need to be slower for better surface finish.
- Inner Wall Speed: This setting adjusts the speed for printing the inner walls of your model.
- Travel Speed: This setting determines the speed at which the extruder moves between different areas of the print without extruding filament.
Step 4: Save and Export the Settings
Once you’ve adjusted the print speeds according to your preferences, save the settings within the slicing software. Some software may require you to export the settings as a separate profile or configuration file.
Step 5: Load the Settings into the Ender 3
Connect your Ender 3 to your computer or transfer the exported settings to the printer’s SD card. Load the settings or configuration file into the printer before starting your print job.
By modifying the print speed settings in your slicing software, you can ensure consistent and repeatable results across multiple print jobs. Additionally, many slicing software packages offer advanced features like speed overrides for specific areas or layers, allowing you to fine-tune the print speed even further.
Alternative Methods for Changing Print Speed
While the control panel and slicing software are the most common methods for adjusting print speed on the Ender 3, there are a few alternative approaches you can consider.
Octoprint and Other 3D Printing Host Software

Octoprint is a popular open-source software that runs on a Raspberry Pi or other compatible devices, allowing you to control and monitor your 3D printer remotely. With Octoprint, you can adjust the print speed during an active print job through the web interface or sending G-code commands.
Other 3D printing host software, such as Repetier-Host or Pronterface, may also offer similar capabilities for adjusting print speed on the fly.
Related Article: How to Refill HP 67 Ink Cartridge
G-code Terminal or Firmware Commands
If you’re comfortable with G-code (the programming language used to control 3D printers), you can directly send commands to your Ender 3 to change the print speed. This can be done through a G-code terminal or by modifying the firmware on the printer’s control board.
For example, the M220 command in G-code is used to set the feed rate or print speed as a percentage of the configured value. To set the print speed to 80% of the configured value, you would send the command “M220 S80” to the printer.
However, it’s important to exercise caution when using firmware commands or modifying G-code, as improper settings or commands can potentially damage your printer or cause failed prints.
Factors to Consider When Adjusting Print Speed
While adjusting the print speed can be an effective way to optimize your 3D printing process, it’s essential to consider several factors that can influence the ideal speed for your specific setup and requirements.
Print Quality
Slower print speeds generally result in higher print quality, as the extruder has more time to deposit the filament accurately. Faster speeds, on the other hand, can lead to issues like poor layer adhesion, surface imperfections, and even failed prints.
Material Properties
Different filament materials have varying optimal print speeds. For example, more rigid filaments like PLA may be able to print at higher speeds without compromising quality, while flexible or abrasive materials like TPU or carbon fiber-reinforced filaments may require slower speeds for consistent results.
Model Complexity
Intricate models with fine details, overhangs, or thin walls may benefit from slower print speeds to ensure accurate reproduction and prevent issues like stringing or layer shifting.
Printer Configuration
The configuration of your Ender 3, including factors like hotend temperature, cooling fan settings, and build plate adhesion, can influence the ideal print speed. Fine-tuning these settings along with the print speed can help achieve the best possible results.
Layer Height and Nozzle Size
Smaller layer heights and nozzle sizes generally require slower print speeds to maintain accuracy and prevent issues like under-extrusion or poor layer adhesion.
By considering these factors and experimenting with different print speed settings, you can find the sweet spot that balances print quality, material requirements, and overall print time for your specific setup and project.
Conclusion
Adjusting the print speed on your Ender 3 is a straightforward process that can significantly impact the quality and efficiency of your 3D prints.
Whether you prefer the convenience of the control panel, the flexibility of slicing software settings, or the advanced control offered by alternative methods like Octoprint or G-code commands, you now have the knowledge to fine-tune your print speeds for optimal results.
Remember, finding the ideal print speed is an iterative process that may require some experimentation and adjustment based on your specific printing requirements, materials, and desired output quality.
By mastering the art of adjusting print speeds, you’ll unlock the full potential of your Ender 3 and take your 3D printing skills to new heights.
Frequently Asked Questions (FAQs)
1. What is the best print speed for Ender 3?
The best print speed for the Ender 3 3D printer can vary depending on several factors, such as the complexity of the model, the quality desired, and the type of filament used. Generally, a print speed between 40-60 mm/s is considered optimal for achieving a good balance between print quality and speed.
However, for detailed or intricate models, a slower speed of around 30-40 mm/s may be recommended to ensure better layer adhesion and accurate reproduction of the design. Additionally, some filaments may require slower speeds to prevent issues like stringing or under-extrusion.
2. How do I make my Ender print faster?
To increase the print speed on your Ender 3 3D printer, you can try several techniques. First, adjust the print speed settings in your slicer software, gradually increasing the value until you notice a decline in print quality.
Additionally, ensure your printer is properly calibrated, as issues like under-extrusion or poor bed adhesion can limit the maximum achievable speed. Using higher temperature settings for certain filaments can also help improve flow and print faster.
However, be cautious not to exceed the manufacturer’s recommended speed, as excessively high speeds may result in poor layer adhesion, stringing, or other quality issues.
3. What is the max speed of Ender 3D?
The maximum recommended print speed for the Ender 3 3D printer can vary based on several factors, but generally falls within the range of 80-100 mm/s.
While the printer’s hardware may be capable of higher speeds, exceeding this range could lead to issues like poor layer adhesion, stringing, under-extrusion, or even skipped steps in the stepper motors.
The specific maximum speed also depends on factors such as the complexity of the model, the type of filament used, and the desired print quality.
It’s advisable to start at lower speeds and gradually increase the setting until you find the optimal balance between print quality and efficiency for your specific requirements.
How to Print Labels on Konica Minolta Printer – 3 Easy Ways
How to Copy on Canon TS3522 Printer – Easy Steps to Follow
How to Restart Kyocera Printer – 4 Easy Methods to Follow
About Author
Mark Kelly
This is Mark, a printer expert from North Carolina, US. It has been 8 years since I started using and reviewing printers of all types. With that said, I decided to share my knowledge with you lovely people so you can make the perfect choice when it comes to choosing a printer.