
How to Add Ink to Epson ET-2760 – Easy Methods to Follow
The Epson ET-2760 stands out in the world of printers with its innovative EcoTank system, a paradigm shift from traditional cartridge-based models. This all-in-one printer offers a cost-effective and environmentally conscious solution for home and small office printing needs.
However, for those new to the EcoTank concept, the process of replenishing ink might seem a bit daunting at first glance.
Fear not! This comprehensive guide will demystify the ink refill process for your Epson ET-2760, ensuring you can keep your printer running smoothly with minimal fuss. We’ll explore various methods to add ink, from using Epson’s original bottles to alternative approaches for the more adventurous users.
Understanding the nuances of the ET-2760’s ink system is crucial for maintaining optimal print quality and maximizing the longevity of your device.
Whether you’re a tech enthusiast or simply looking to make the most of your printer investment, this article will equip you with the knowledge to handle ink refills with confidence and efficiency.
How to Add Ink to Epson ET-2760
We can add ink to the Epson ET-2760 printer in a couple of ways which are discussed in detail below.
Method 1: Adding Ink Using Epson Original Ink Bottles

This is the recommended method for refilling your ET-2760, as it ensures compatibility and maintains your printer’s warranty.
Step 1: Prepare Your Workspace
Choose a clean, well-lit area to perform the ink refill. Lay down some newspaper or a protective cloth to catch any potential spills.
Step 2: Check Ink Levels
Before starting the refill process, check the ink levels in your printer. You can do this through the printer’s control panel or by visually inspecting the transparent ink tanks on the front of the printer.
Step 3: Gather Supplies
Collect the appropriate Epson 522 ink bottles for the colors you need to refill. Ensure you have the correct colors and that the bottles are genuine Epson products.
Step 4: Power On the Printer
Turn on your Epson ET-2760 and wait for it to initialize completely.
Step 5: Open the Ink Tank Cover
Locate the ink tank cover on the right side of the printer and open it carefully.
Step 6: Remove the Ink Tank Cap
Identify the tank you want to refill and remove its cap. Each cap is color-coded to match its corresponding ink.
Step 7: Prepare the Ink Bottle
Take the appropriate ink bottle and remove its cap. Do not squeeze the bottle at this point.
Step 8: Insert the Bottle into the Tank
Align the bottle’s nozzle with the corresponding tank’s filling port. The bottle should fit snugly due to the key system.
Step 9: Begin Filling the Tank
Gently squeeze the ink bottle to start the flow of ink into the tank. The tank will automatically stop filling when it reaches capacity, preventing overfilling.
Step 10: Remove and Seal the Bottle
Once the ink stops flowing, carefully remove the bottle from the tank. Seal it tightly with its cap for future use.
Step 11: Replace the Ink Tank Cap
Securely replace the cap on the ink tank you just filled.
Step 12: Repeat for Other Colors
If necessary, repeat steps 6-11 for any other colors that need refilling.
Step 13: Close the Ink Tank Cover
After refilling all necessary tanks, close the ink tank cover firmly.
Note: Refill inks when they reach the lower line on the tank, not when they’re completely empty.
Step 14: Complete the Process
The printer will detect the new ink levels and may perform a brief charging cycle. Follow any on-screen prompts to complete the process.
Related Article: How to Reset Epson ET-2760
Method 2: Using Third-Party Ink Refill Kits
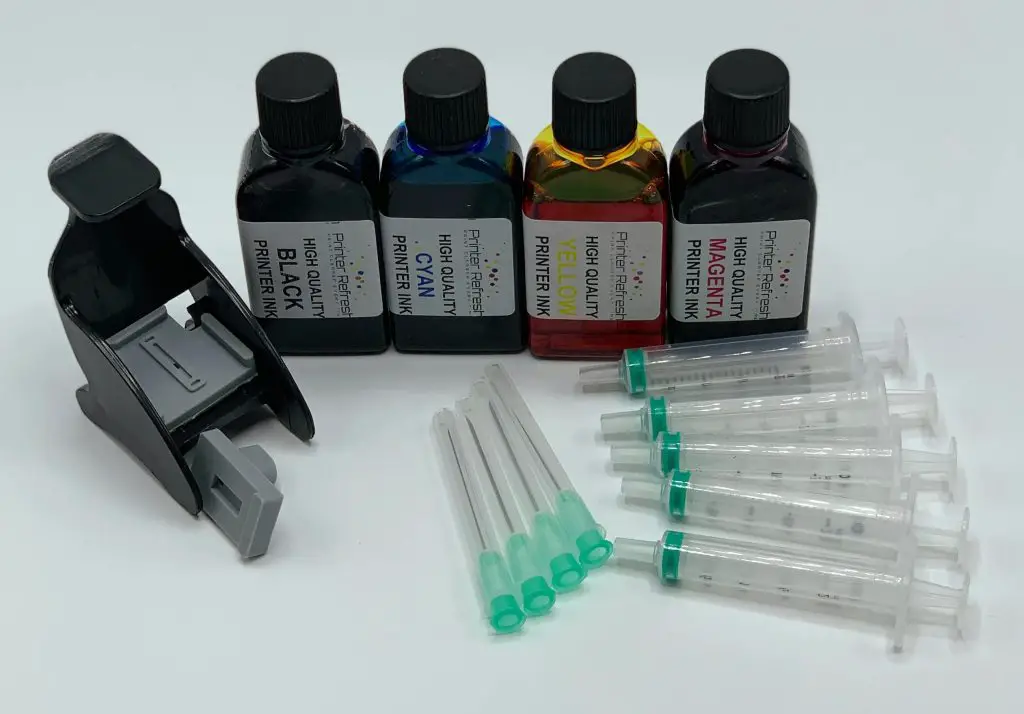
While Epson recommends using their original inks, some users opt for third-party refill kits. Be aware that this method may void your warranty and could potentially affect print quality.
Step 1: Purchase a Compatible Refill Kit
Research and purchase a high-quality third-party ink refill kit specifically designed for the Epson ET-2760.
Step 2: Prepare Your Workspace
Set up a clean area with good lighting and protect the surface with newspaper or a cloth.
Step 3: Check Ink Levels
Verify which colors need refilling by checking the printer’s ink levels.
Step 4: Follow Kit Instructions
Carefully read and follow the instructions provided with your third-party refill kit. These may vary from Epson’s official method.
Step 5: Fill Syringes or Bottles
If your kit uses syringes, fill them with the appropriate colors according to the kit’s instructions.
Step 6: Access the Ink Tanks
Open the ink tank cover on your ET-2760 and remove the caps from the tanks you’ll be refilling.
Step 7: Refill the Tanks
Slowly and carefully inject or pour the ink into each tank, being cautious not to overfill or mix colors.
Step 8: Clean Up and Reassemble
Wipe any spills, replace the tank caps, and close the ink tank cover.
Step 9: Reset Ink Levels (If Necessary)
Some third-party kits may require you to reset the ink levels manually. Follow the kit’s instructions for this process.
Conclusion
Adding ink to your Epson ET-2760 is a straightforward process that, when done correctly, ensures optimal print quality and extends the life of your printer. By following the methods outlined in this guide and adhering to best practices for ink management, you can enjoy the cost-saving and environmental benefits of the EcoTank system.
Remember that while third-party ink options exist, using Epson’s original inks is the most reliable way to maintain your printer’s performance and warranty. Regular maintenance, proper ink handling, and understanding your printer’s ink consumption patterns will help you get the most out of your ET-2760.
With its innovative design and user-friendly refill system, the Epson ET-2760 represents a significant step forward in home and small office printing technology.
By mastering the ink refill process, you’re not just maintaining a printer; you’re participating in a more sustainable and economical approach to printing that benefits both your wallet and the environment.
Frequently Asked Questions (FAQs)
1. How to check ink levels on Epson ET-2760?
To check ink levels on your Epson ET-2760 printer, start by pressing the Home button on the control panel. Navigate to the “Setup” menu and select “Ink Levels” or “Maintenance”. The display will show current ink levels for all colors.
Alternatively, you can use your computer by opening the Epson printer utility software and looking for the “Maintenance” or “Status” tab, where you’ll find an ink level indicator.
This method displays remaining ink for each color. Remember to refill ink tanks when levels are low to maintain print quality and prevent potential printer damage.
For more in-depth solutions, you can also give a read to our detailed guide on how to check ink levels on Epson ET-2760.
2. How to do power cleaning on Epson ET-2760?
To perform a power cleaning on your Epson ET-2760 printer, start by accessing the printer’s control panel. Press the Home button, then navigate to the “Setup” or “Maintenance” menu. Select “Power Cleaning” from the options.
The printer will warn you that this process consumes a significant amount of ink, so only proceed if necessary. Confirm your choice, and the printer will begin the cleaning cycle, which may take several minutes.
After completion, print a nozzle check pattern to verify if the cleaning was successful. If print quality issues persist, you may need to repeat the process. Remember to use this feature sparingly, as it depletes ink quickly.
You know what? You guessed it. We have a comprehensive guide on how to power clean Epson ET-2760 too. You can check it out.
3. Why is my ET 2760 ink full but not printing?
If your Epson ET-2760 ink tanks are full but the printer isn’t printing, several issues could be at play. First, check if the printheads are clogged by running a nozzle check. If they are, perform a head cleaning. Ensure the ink tubes are properly primed and free of air bubbles.
Verify that you’re using genuine Epson ink, as third-party inks can cause problems. Check for any error messages on the printer’s display that might indicate other issues.
Make sure the printer driver is up-to-date and properly installed on your computer. If these steps don’t resolve the problem, the printhead may be damaged and require professional service or replacement.
How to Print All Files in a Folder – Easy Guide
How to Restart Lexmark Printer – 2 Easy Ways to Follow
How to Restart Kyocera Printer – 4 Easy Methods to Follow
About Author
Mark Kelly
This is Mark, a printer expert from North Carolina, US. It has been 8 years since I started using and reviewing printers of all types. With that said, I decided to share my knowledge with you lovely people so you can make the perfect choice when it comes to choosing a printer.